Perfect All-Butter Pie Crust Recipe
If you’re searching for a foundation that delivers true golden flakiness every time, look no further than this Perfect All-Butter Pie Crust Recipe. It’s crisp around the edges, tender beneath your fork, and beautifully lifts any filling you choose to pile inside. There’s no fuss here, just honest, simple ingredients and a technique that brings bakery-level results straight from your kitchen—ideal for sweet or savory pies, and a recipe you’ll pull out again and again.
Ingredients You’ll Need
This Perfect All-Butter Pie Crust Recipe shines because of its simplicity—just a handful of fundamental ingredients, each playing a crucial role. Every element creates the flavor, texture, and flawless color that pie lovers dream of. If you’ve ever wondered how to achieve that enviable crisp bite and delicate layers, these pantry staples are your ticket.
- Cold Unsalted Butter (½ cup/113g): For unbeatable flakiness and that rich, pure flavor—always start cold!
- All-Purpose Flour (1¼ cups/150g): The sturdy backbone that holds your dough together yet remains oh-so-tender.
- Salt (½ teaspoon): A pop of seasoning that enhances all the other flavors—don’t skip this little hero.
- Sugar (1 teaspoon): Just a hint boosts browning and adds a subtle sweetness, balancing the crust perfectly.
- Vodka (1 tablespoon, or substitute buttermilk): This is the baker’s secret for extra-tender crusts—vodka inhibits gluten, but you won’t taste it!
- Ice-cold Water (2-3 tablespoons, plus more as needed): Keeps the butter chilled while pulling the dough together for a just-right consistency.
How to Make Perfect All-Butter Pie Crust Recipe
Step 1: Chill the Butter
Cold butter is the difference between flaky layers and a tough, chewy crust. Slice your butter into small cubes first—this helps it chill quickly and disperse evenly through your dough. Pop these cubes in the freezer for 15 to 30 minutes. Not only does this step help the butter hold its shape during mixing, but it also ensures your crust will puff up beautifully in the oven, creating those oh-so-desirable flaky pockets.
Step 2: Make the Dough
Combine your all-purpose flour, sugar, and salt in a food processor and pulse quickly to mix. Scatter your icy cold butter cubes over the mixture, and pulse in short bursts for about 20 to 30 seconds. You’re aiming for a crumbly texture with pieces of butter that are no larger than pea-sized. Resist the urge to over-process—those intact butter bits are flavor bombs that transform the crust during baking!
Step 3: Add Liquids
Next, pour a tablespoon of vodka over your crumbly mixture (or substitute with buttermilk for a subtle tang), along with 2 to 3 tablespoons of ice-cold water. Pulse again until the dough just starts coming together in beads; it should still look a bit shaggy and crumbly. To check consistency, squeeze a bit of dough—if it holds together, you’re set. If it’s dry, dribble in more water, half a tablespoon at a time; if wet, dust lightly with flour.
Step 4: Form and Chill the Dough
Scoop your dough onto a well-floured surface and use your hands to gently form it into a disk. Wrap the dough snugly in plastic wrap or place it in a reusable bag, then chill in the fridge for at least 30 minutes (or up to 2 days). This rest allows the gluten to relax and the butter to firm up, resulting in a crust that’s both easy to roll and wonderfully tender once baked. Want to get ahead? Freeze the wrapped disk for up to 2–3 months—pie on demand!
Step 5: Roll the Dough
Once chilled, dust your work surface and rolling pin with flour. Roll out the dough into a circle about 1 inch wider than your pie plate for generous coverage. If transferring the dough feels tricky, fold it in half before moving it to the pie dish, then unfold and gently ease it into place. If the dough tears or stretches, don’t fret—just reshape and roll out again. This forgiving Perfect All-Butter Pie Crust Recipe makes it easy!
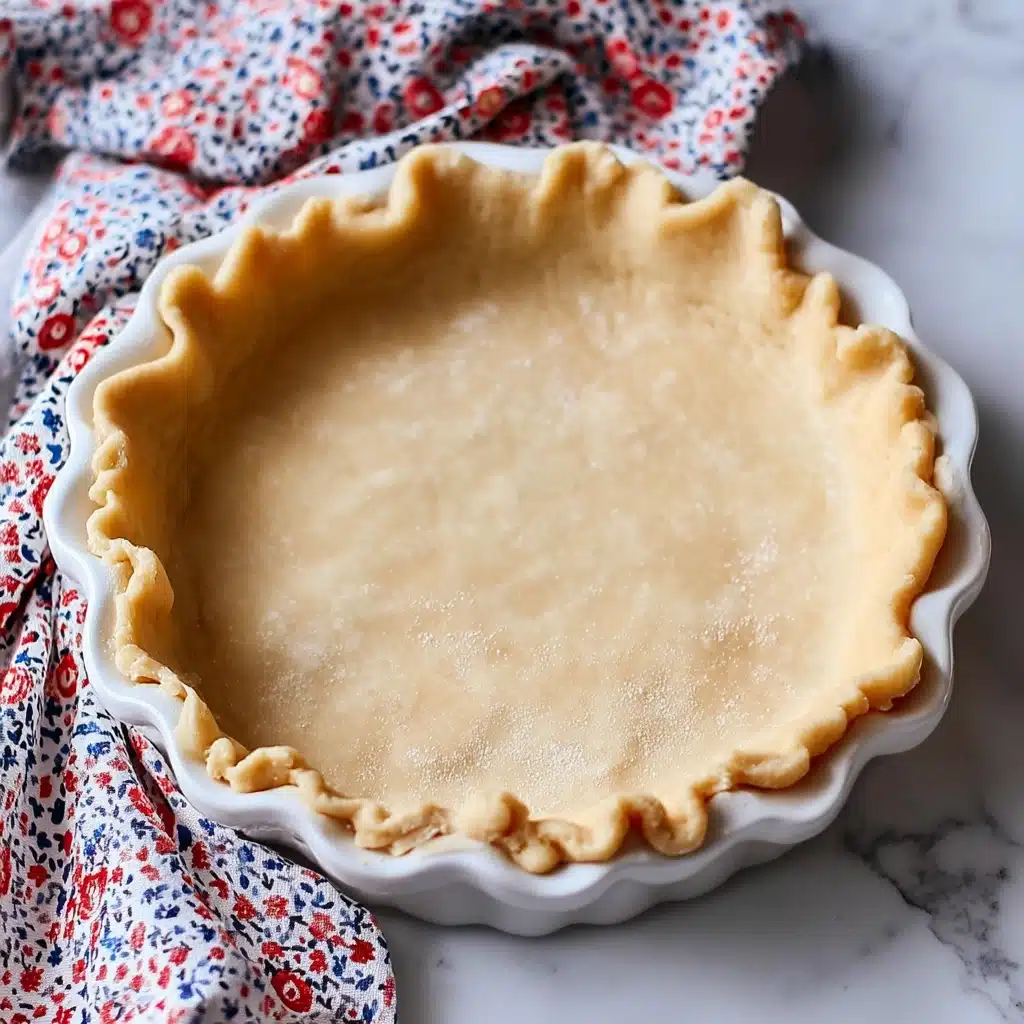
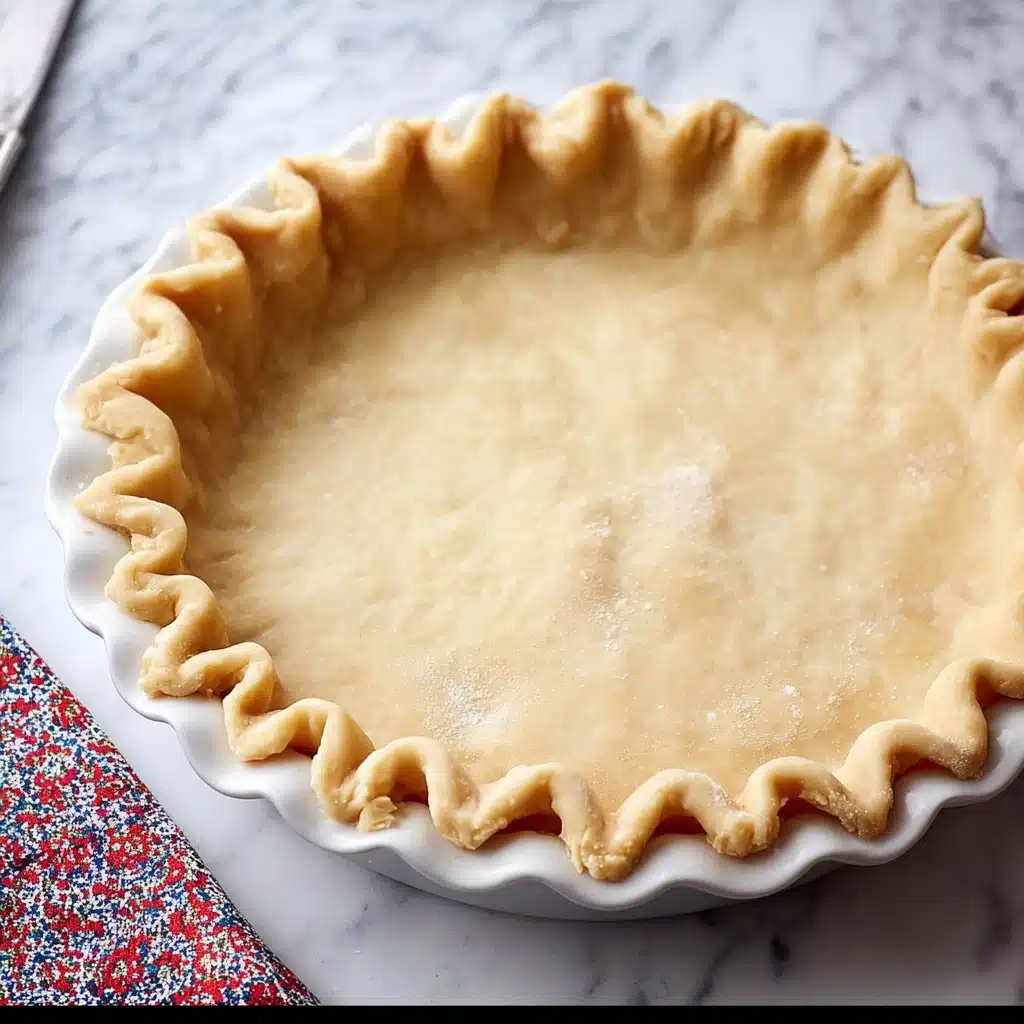
Step 6: Trim and Flute the Edges
Take a sharp knife or kitchen scissors to trim any excess dough from around your pie plate. Now’s your chance to get creative: use your fingers to flute the edge with a classic wavy pattern, or press down with a fork for a rustic finish. Once sculpted, chill the crust in the fridge while you prep your filling—this final cool-down helps set the shape so your crust bakes up picture-perfect.
Step 7: Scaling Up
This recipe yields enough for a single-crust pie—think luscious quiches or dream-worthy lemon meringue. For double-crust beauties (hello, apple pie!), just double every ingredient. You’ll have glorious, flaky layers top and bottom, truly showcasing this Perfect All-Butter Pie Crust Recipe.
How to Serve Perfect All-Butter Pie Crust Recipe
Garnishes
Naturally, the crust is the star, but a sprinkle of coarse sugar or a brush of egg wash before baking creates a gorgeous, glistening finish. For savory pies, a few flakes of sea salt or cracked pepper pressed into the edge add extra flavor. Garnish with a few decorative dough cutouts or a twist of citrus zest for a festive look.
Side Dishes
A well-made pie, especially one with the Perfect All-Butter Pie Crust Recipe, is fabulous served solo but shines even brighter alongside a scoop of vanilla ice cream, a dollop of lemon curd, or a silky crème fraîche. For savory pies, try a lightly dressed green salad or a piping bowl of creamy soup to round out the meal.
Creative Ways to Present
Show off your handiwork by serving wedges on vintage plates, decorating the rim with edible flowers or fresh herbs, or offering mini individual pies baked in muffin tins—always a crowd-pleaser. You can also create a lattice-top look or use cookie cutters to make playful shapes from leftover dough. However you choose to present, your Perfect All-Butter Pie Crust Recipe will take center stage!
Make Ahead and Storage
Storing Leftovers
If you have extra crust or leftover pie, store it covered in the fridge for up to 2 days. The butter-rich flavor stays delicious, and the texture holds up better than you might expect—just don’t leave it at room temperature for too long, as the high butter content can soften.
Freezing
This crust is made for prepping ahead! Tightly wrap unbaked dough disks in plastic wrap and then foil to protect against freezer burn. You can freeze the dough for up to three months—let it thaw overnight in the fridge before rolling. Extra baked crust can be frozen too, preferably in airtight containers or wrapped well to lock in freshness.
Reheating
To revive slices of baked pie or baked crust, place them in a 350°F oven for 5–10 minutes. This brings back some of the crust’s original crispness and warms your filling, making it taste fresh from the oven once again. Avoid microwaving—high butter content can make the crust soggy.
FAQs
Can I use salted butter instead of unsalted?
Absolutely! Just reduce the added salt in the recipe to compensate. Salted butter can boost flavor, but keeping a light hand with extra salt ensures your pie crust isn’t overpowering.
Why does this recipe use vodka?
Vodka provides moisture for easy rolling but evaporates as the pie bakes. It doesn’t activate gluten like water, giving you a tender, flaky result every time. You’ll never taste it—only enjoy the buttery texture!
How do I stop my crust from shrinking in the pie plate?
Always chill your crust well before baking and don’t stretch the dough when fitting it into the pan. Letting the dough rest helps maintain its lovely shape and keeps your lattice or fluted edges looking sharp.
Is this crust suitable for sweet and savory pies?
The beauty of the Perfect All-Butter Pie Crust Recipe is its versatility! Use it for apple, pumpkin, chicken pot pie, quiche, or whatever your craving. Just adjust garnish and fillings to suit your menu.
Can I make this recipe without a food processor?
Definitely! You can cut the butter into your flour mixture using a pastry blender, two knives, or even your fingertips (work quickly to avoid melting the butter). The results are every bit as delicious and flaky.
Final Thoughts
Once you try this Perfect All-Butter Pie Crust Recipe, you’ll wonder how you ever made pie any other way. Its rich, flaky texture and adaptable technique make it a kitchen staple you’ll turn to with confidence, no matter the season. Give it a shot—you may just find yourself looking for excuses to bake another pie!
PrintPerfect All-Butter Pie Crust Recipe

Learn how to make the perfect all-butter pie crust with this easy recipe. This flaky and buttery crust is ideal for both sweet and savory pies.
- Prep Time: 45 minutes
- Cook Time: 0 minutes
- Total Time: 45 minutes
- Yield: 1 pie crust 1x
- Category: Dessert
- Method: Baking
- Cuisine: American
- Diet: Vegetarian
Ingredients
For the Crust:
- ½ cup (113g) unsalted butter (1 stick), cold and cut into small cubes
- 1 ¼ cups (150g) all-purpose flour, plus extra for dusting
- ½ teaspoon salt
- 1 teaspoon sugar
- 1 tablespoon vodka (or substitute with buttermilk)
- 2–3 tablespoons ice-cold water, plus more if necessary
Instructions
- Chill the Butter: Before starting the dough, cut the butter into small cubes and place them on a plate. Put the butter in the freezer for 15-30 minutes to ensure it’s very cold.
- Make the Dough: In a food processor, combine the flour, sugar, and salt by pulsing a few times. Add the cold butter cubes and pulse for 20-30 seconds until the mixture resembles coarse crumbs with pea-sized butter pieces.
- Add Liquids: Pour in 1 tablespoon of vodka and 2-3 tablespoons of ice-cold water. Pulse the mixture until it begins to come together into small beads of dough. The dough should be slightly crumbly but should stick together when you squeeze a bit between your fingers. If it’s too dry, add additional water, 1/2 tablespoon at a time. If the dough feels too wet, add flour by the 1/2 tablespoon until it comes together.
- Form and Chill the Dough: Transfer the dough onto a well-floured surface and press it into a disk. Wrap it in plastic wrap or place it in a reusable bag. Chill the dough in the fridge for at least 30 minutes to 1 hour (up to 2 days). If you want to store it for longer, freeze it for up to 2-3 months, wrapped tightly in plastic and foil.
- Roll the Dough: Once chilled, place the dough on a floured surface and use a floured rolling pin to roll it into a round shape. The circle should be about 1 inch larger than an upside-down 9-inch pie plate. Fold the dough in half to make it easier to transfer to the pie plate. Unfold and gently fit it into the pie plate. If the dough tears or stretches, reshape it into a disk and roll it out again.
- Trim and Flute the Edges: Trim any excess dough around the edges of the pie plate and discard it. Flute the edges using your fingers or a fork, then cover the pie crust with plastic wrap and refrigerate while you prepare your pie filling.
- This recipe makes one single pie crust. Double the ingredients if you need a double crust for your pie.
Nutrition
- Serving Size: 1 slice
- Calories: 160
- Sugar: 1g
- Sodium: 120mg
- Fat: 11g
- Saturated Fat: 7g
- Unsaturated Fat: 3g
- Trans Fat: 0g
- Carbohydrates: 14g
- Fiber: 0.5g
- Protein: 2g
- Cholesterol: 30mg
Keywords: pie crust, butter crust, homemade pie crust


