cake pops Recipe
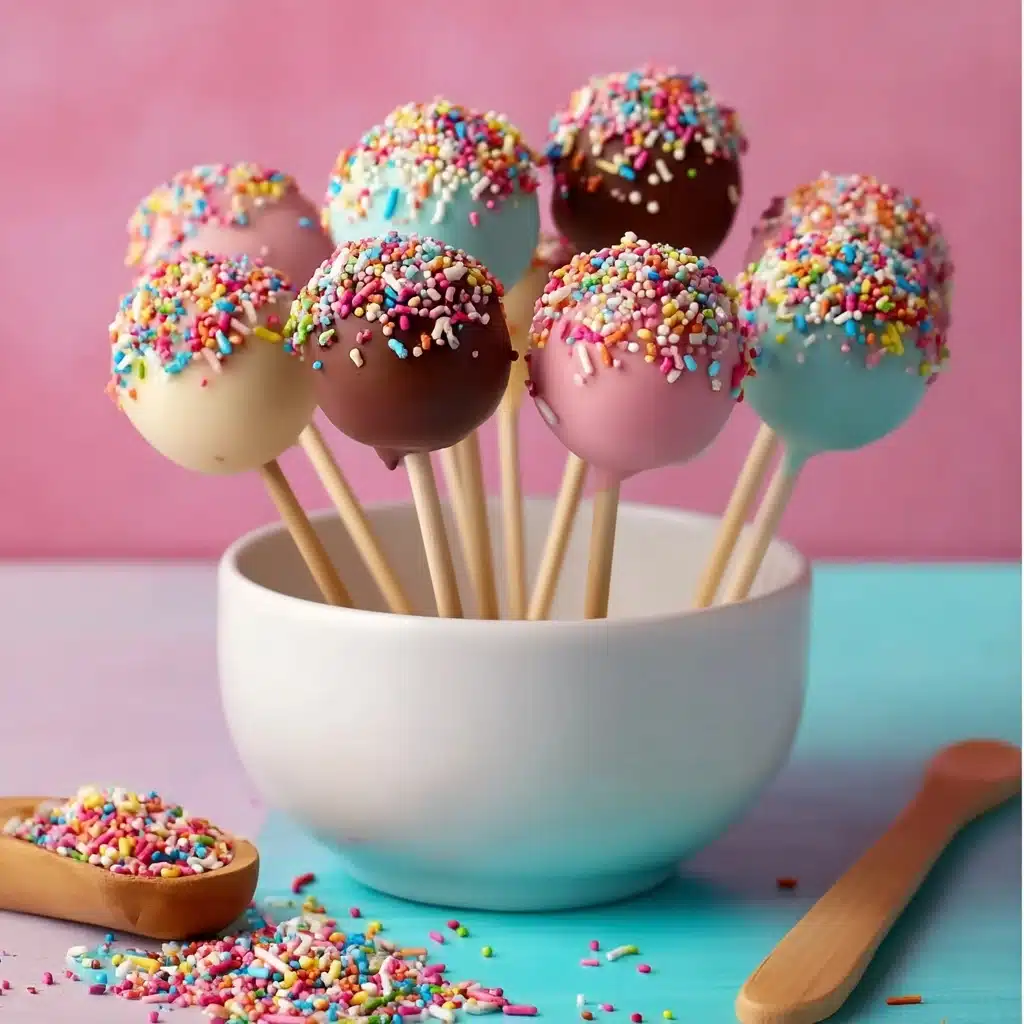
If you’re looking for a fun, delightful treat that’s as visually charming as it is delicious, cake pops are the way to go. These little bites of happiness combine moist cake and creamy frosting rolled into perfect spheres, then dipped in colorful candy melts for the ultimate party snack or sweet gift. Whether you’re a seasoned baker or just diving into the world of desserts, making cake pops is a joyful, hands-on experience that allows you to embrace your creativity while satisfying your sweet tooth.

Ingredients You’ll Need
Gathering the right ingredients is half the fun, and with cake pops, each item plays a crucial role—from the structure to the flavor and look. The simplicity of these ingredients means you can customize with ease, and each one helps bring this treat to life.
- Vanilla cake mix: The foundation of the pops, providing a light and fluffy texture that balances perfectly with the frosting.
- Eggs, oil, water: Essential for baking the cake just right according to the box instructions—don’t skip these.
- Vanilla frosting: Acts as the binder to hold the cake crumbs together, while adding a touch of sweetness and richness.
- Candy melts: These colorful melts coat the cake balls with a smooth, glossy finish that’s perfect for decorating.
- Sprinkles, crushed nuts, or edible glitter: The magic toppings that turn plain cake pops into dazzling edible masterpieces.
- Lollipop sticks: These sturdy sticks make it easy to dip and hold your cake pops without the mess.
- Styrofoam block or cake pop stand: To keep your cake pops upright and dry perfectly after decorating.
How to Make cake pops
Step 1: Bake & Cool
First things first, bake your vanilla cake mix according to the instructions on the box—this usually means blending in the eggs, oil, and water, then baking for about 25 minutes. Patience here is key because you want the cake completely cool before moving forward; warm crumbs won’t mix well with frosting.
Step 2: Crumble & Mix
Once cooled, crumble the cake into fine, almost sandy crumbs. Stir in the vanilla frosting little by little until you reach a dough-like consistency that’s sticky enough to hold together when shaped but not overly moist.
Step 3: Shape & Chill
Roll your mixture into 1-inch balls—perfect bite size! Pop these onto a tray and chill them in the fridge for about 30 minutes so they become firm and easier to handle for dipping.
Step 4: Add Sticks
Melt a small amount of your candy melts. Dip the tip of each lollipop stick into the melted candy and then gently push it halfway into each chilled cake ball. This “glue” step ensures the stick stays firmly attached. Chill the pops again for 15 minutes to set.
Step 5: Coat & Decorate
Melt the rest of the candy melts according to package instructions. Dip each cake pop fully into the melted candy, tapping off any excess coating. Before they set, sprinkle on your choice of decorations—sprinkles, nuts, or edible glitter. Place them upright in your Styrofoam block or stand until completely dry.
How to Serve cake pops
Garnishes
To elevate your cake pops, consider a variety of garnishes like rainbow sprinkles for a festive vibe, crushed nuts for a sophisticated crunch, or shimmering edible glitter for a touch of glamour. These add texture and personality to each bite, making them irresistible eye candy as well as delicious treats.
Side Dishes
Cake pops are versatile and pair well with many things. Offer them alongside fresh fruit for a refreshing contrast, creamy dips like chocolate ganache for dipping, or even a cup of coffee or tea to complement their sweetness during a cozy gathering.
Creative Ways to Present
Presentation is everything! Display your cake pops in a decorated Styrofoam block wrapped with colorful paper, arrange them in mason jars filled with candy beads, or create a centerpiece by placing them in a tiered cake pop stand. Adding ribbons or personalized tags can turn your cake pops into memorable favors for parties.
Make Ahead and Storage
Storing Leftovers
If you happen to have leftovers, cake pops keep best when stored in an airtight container in the refrigerator. This will preserve their shape and flavor for up to 3 days, making them perfect for prepping in advance or enjoying slowly over time.
Freezing
You can freeze cake pops by laying them flat on a baking sheet until frozen solid, then transferring them to a sealed freezer bag. This method prevents them from sticking to each other and keeps them fresh for up to 2 months. Thaw them at room temperature before serving.
Reheating
Because cake pops are best enjoyed cool, reheating isn’t typically necessary. If the coating has become dull, simply let them sit at room temperature for a while rather than microwaving, which can ruin the texture and cause melting.
FAQs
Can I use homemade cake instead of box mix?
Absolutely! Homemade cakes can add wonderful flavor and texture, just make sure the cake is fully cooled before crumbling, and adjust frosting quantity to achieve that perfect dough-like consistency.
How do I prevent cake pops from falling off the sticks?
Melted candy melts act as a glue when you dip the stick tips before inserting them into the cake balls. Chilling after inserting the sticks also helps set and secure everything in place.
What if my cake pops crack after dipping?
Cracks usually happen if the pops are too cold when dipped. Try letting cake pops warm slightly at room temperature before coating or thin out your candy melts by adding a bit of vegetable oil for a smoother dip.
Can I use chocolate instead of candy melts?
Yes, you can use chocolate, but be aware that chocolate needs tempering for a smooth finish and will harden differently than candy melts. It’s a bit trickier but definitely doable with patience.
How long do cake pops stay fresh?
When stored properly in an airtight container in the fridge, cake pops stay delicious for up to 3 days. For longer storage, freezing is recommended.
Final Thoughts
Making cake pops is such a delightful way to bring a little extra joy into your kitchen and onto your dessert table. They offer endless opportunities to experiment with flavors, colors, and decorations. So roll up your sleeves, grab those ingredients, and dive into the fun of crafting your own batch of cake pops—you’ll be amazed at how addictive this sweet little dessert can become!
Printcake pops Recipe

Delicious and fun vanilla cake pops made from scratch using a simple cake mix and frosting, coated in colorful candy melts and decorated with sprinkles or edible glitter, perfect for parties and celebrations.
- Prep Time: 20 minutes
- Cook Time: 25 minutes
- Total Time: 1 hour 15 minutes
- Yield: 24 cake pops 1x
- Category: Dessert, Snack
- Method: Baking, Chilling, Dipping
- Cuisine: American
- Diet: Vegetarian
Ingredients
Cake Base
- 1 box vanilla cake mix (plus required ingredients: eggs, oil, water)
- 1 cup vanilla frosting (store-bought or homemade)
Decoration
- 2 cups candy melts (assorted colors)
- Sprinkles, crushed nuts, or edible glitter (for decorating)
- 24 lollipop sticks
- Styrofoam block or cake pop stand
Instructions
- Bake & Cool: Prepare the vanilla cake mix according to the package instructions, including eggs, oil, and water. Bake in the oven for approximately 25 minutes until a toothpick inserted comes out clean. Remove the cake and allow it to cool completely to room temperature.
- Crumble & Mix: Once cooled, crumble the cake into fine breadcrumbs using your hands or a food processor. Combine the cake crumbs with 1 cup of vanilla frosting until a dough-like consistency is formed, ensuring the mixture holds together when shaped.
- Shape & Chill: Roll the cake-frosting mixture into 1-inch balls using your hands. Place the balls on a baking sheet lined with parchment paper. Refrigerate for about 30 minutes to firm up and make them easier to handle.
- Add Sticks: Melt a small portion of the candy melts according to package instructions, using a microwave or double boiler. Dip the tip of each lollipop stick into the melted candy, then insert it halfway into each chilled cake ball to secure the sticks. Return the cake pops to the refrigerator for 15 minutes to set.
- Coat & Decorate: Melt the remaining candy melts fully, ensuring they are smooth and runny enough for dipping. Dip each cake pop into the melted candy, tapping off any excess coating gently. Immediately decorate with sprinkles, crushed nuts, or edible glitter while the coating is still wet. Stand the cake pops upright in a Styrofoam block or cake pop stand to dry completely.
Notes
- Use a clean utensil and dry hands to shape the cake balls to prevent them from becoming too sticky.
- For best results, allow the candy coating to cool slightly before dipping so it is thick enough to coat properly but not so hot that it melts the cake balls.
- Store finished cake pops in an airtight container at room temperature for up to 2 days or refrigerate for up to 5 days.
- Customize colors and decorations to match any event theme.
- If candy melts are unavailable, white chocolate or colored melting chocolate can be substituted.
Nutrition
- Serving Size: 1 cake pop
- Calories: 150
- Sugar: 18g
- Sodium: 100mg
- Fat: 7g
- Saturated Fat: 4g
- Unsaturated Fat: 2g
- Trans Fat: 0g
- Carbohydrates: 22g
- Fiber: 0.5g
- Protein: 1g
- Cholesterol: 15mg
Keywords: cake pops, vanilla cake pops, cake balls, candy melts, party treats, dessert pops, kid-friendly dessert

