Chocolate Chip Red Velvet Mini Loaves Recipe
Introduction
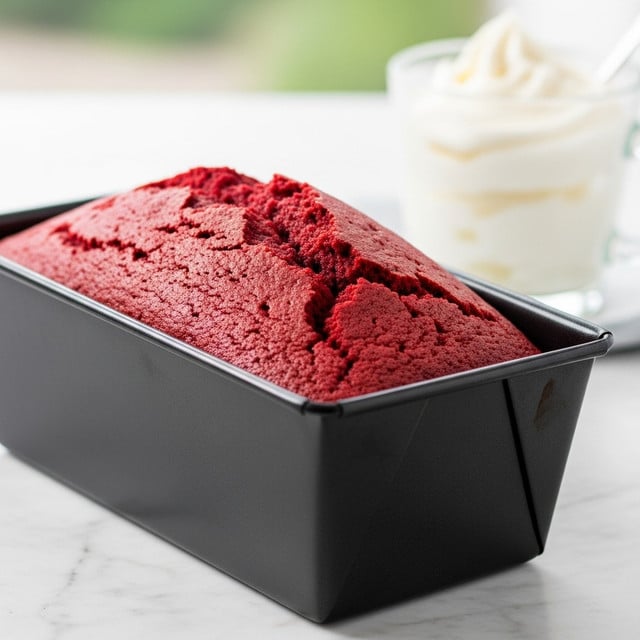
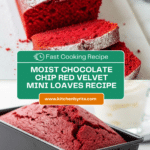
These Chocolate Chip Red Velvet Mini Loaves are a delightful twist on a classic favorite. Rich, moist, and packed with mini chocolate chips, they make perfect treats for sharing or special occasions.

Ingredients
- 2 ounces bittersweet chocolate (baking chocolate – 2 squares)
- ½ cup water
- 1 cup light brown sugar (firmly packed)
- ½ cup butter (softened, 1 stick)
- 2 large eggs
- 1 tsp vanilla extract
- ½ cup sour cream
- 1 tbsp red food coloring
- 1½ cups all-purpose flour
- 1 tsp baking soda
- ½ tsp salt
- ⅓ cup mini chocolate chips
- 1 cup confectioners sugar
- 2 tbsp milk (adjust 1-3 tbsp for desired icing thickness)
- Snowflake sprinkles (optional)
Instructions
- Step 1: Preheat the oven to 350 degrees Fahrenheit. Spray the bottoms only of 3 mini loaf pans with baking spray and set aside.
- Step 2: In a small saucepan, combine the bittersweet chocolate and water. Heat over low, stirring occasionally until the chocolate is melted. Remove from heat and let cool to room temperature.
- Step 3: In a large bowl, combine the brown sugar, softened butter, eggs, and vanilla extract. Whisk well until the mixture is creamy.
- Step 4: Add the melted chocolate mixture and sour cream to the bowl. Whisk again until smooth.
- Step 5: Beat in the red food coloring, followed by the flour, baking soda, and salt. Mix until just combined.
- Step 6: Fold in the mini chocolate chips gently.
- Step 7: Spoon the batter evenly into the prepared mini loaf pans.
- Step 8: Bake for 35-40 minutes, or until a toothpick inserted into the center comes out clean.
- Step 9: Cool the loaves in the pans on a cooling rack. Once cool, remove them from the pans.
- Step 10: To prepare the icing, place the confectioners sugar in a bowl and whisk in 1 tablespoon of milk at a time using a fork until the desired consistency is reached.
- Step 11: Drizzle the icing over the cooled loaves and sprinkle with snowflake sprinkles if desired. Enjoy immediately or wrap as gifts for friends and family.
Tips & Variations
- For a more intense chocolate flavor, use semi-sweet chocolate chips instead of mini chocolate chips.
- If you prefer a less sweet icing, reduce the confectioners sugar slightly or add a pinch of salt.
- Substitute sour cream with Greek yogurt for a tangier taste and a lighter texture.
- Adding a teaspoon of instant coffee powder to the melted chocolate mixture can enhance the chocolate depth.
- Snowflake sprinkles are optional but add a festive touch for holiday occasions.
Storage
Store the mini loaves in an airtight container at room temperature for up to 3 days. For longer storage, refrigerate for up to one week or freeze wrapped tightly for up to 3 months. When ready to eat, thaw if frozen and warm lightly in the microwave to enjoy that freshly baked feel.
How to Serve
Serve this delicious recipe with your favorite sides.
FAQs
Can I use regular-sized loaf pans instead of mini loaf pans?
Yes, you can use a regular 9×5-inch loaf pan. The baking time will increase to about 50-60 minutes, so check doneness with a toothpick starting at 50 minutes.
What if I don’t have red food coloring?
You can omit the red food coloring if desired—your loaves will be a rich chocolate color but still delicious. Alternatively, try natural food dyes like beet juice for color.
PrintChocolate Chip Red Velvet Mini Loaves Recipe

These Chocolate Chip Red Velvet Mini Loaves are a delightful twist on the classic red velvet cake, featuring rich bittersweet chocolate, a hint of tangy sour cream, and mini chocolate chips throughout. Perfectly sized in mini loaf pans, they bake to a moist, tender crumb with a luscious cream cheese-like icing drizzled on top and optional snowflake sprinkles for a festive finish. Ideal as sweet gifts or a special treat, these loaves combine vibrant color, deep chocolate flavor, and a hint of vanilla for an irresistible dessert.
- Prep Time: 15 minutes
- Cook Time: 35-40 minutes
- Total Time: 50-55 minutes
- Yield: 3 mini loaves 1x
- Category: Dessert
- Method: Baking
- Cuisine: American
Ingredients
Cake Ingredients
- 2 ounces bittersweet chocolate (baking chocolate – 2 squares)
- ½ cup water
- 1 cup brown sugar (firmly packed, light)
- ½ cup butter (softened, 1 stick)
- 2 large eggs
- 1 tsp vanilla extract
- ½ cup sour cream
- 1 tbsp red food coloring
- 1½ cups all-purpose flour
- 1 tsp baking soda
- ½ tsp salt
- ⅓ cup mini chocolate chips
Icing Ingredients
- 1 cup confectioners sugar
- 2 tbsp milk (adjust 1–3 tbsp for desired thickness)
- Snowflake sprinkles (optional)
Instructions
- Preheat Oven and Prepare Pans: Preheat your oven to 350°F (175°C). Spray the bottoms only of 3 mini loaf pans with baking spray and set aside.
- Melt Chocolate: In a small saucepan, combine the bittersweet chocolate and water. Heat over low heat, stirring occasionally until smooth and melted. Remove from heat and allow to cool to room temperature.
- Mix Wet Ingredients: In a large bowl, combine the brown sugar, softened butter, eggs, and vanilla extract. Whisk vigorously until the mixture is creamy.
- Add Chocolate and Sour Cream: Stir in the cooled melted chocolate mixture and sour cream. Whisk again until the batter is smooth and evenly combined.
- Add Food Coloring and Dry Ingredients: Beat in the red food coloring thoroughly. Then, add the all-purpose flour, baking soda, and salt. Mix just until incorporated to avoid overmixing.
- Fold in Chocolate Chips: Gently fold the mini chocolate chips into the batter, ensuring they are evenly distributed without deflating the batter.
- Fill Pans and Bake: Spoon the batter evenly into the prepared mini loaf pans. Place in the preheated oven and bake for 35-40 minutes, or until a toothpick inserted in the center comes out clean.
- Cool Loaves: Remove the pans from the oven and place them on a cooling rack. Allow the loaves to cool completely in the pans.
- Prepare Icing: In a small bowl, place the confectioners sugar and whisk in 1 tablespoon of milk at a time, using a fork, until you reach your desired drizzle consistency.
- Decorate and Serve: Once the loaves have cooled, remove them from the pans. Drizzle the icing over the top of each mini loaf and sprinkle with snowflake sprinkles if desired. Enjoy immediately or wrap as gifts for friends and family.
Notes
- Make sure the melted chocolate mixture is cooled to room temperature before adding to prevent curdling the batter.
- Do not spray the sides of the loaf pans to allow even rise and easy removal.
- Adjust the milk in the icing to achieve thicker or thinner consistency based on preference.
- Mini chocolate chips are preferred to distribute evenly without sinking.
- Snowflake sprinkles are optional but add a festive touch perfect for holiday gifting.
- Store loaves in an airtight container at room temperature for up to 3 days or refrigerate for up to one week.
- For a dairy-free version, substitute butter with a dairy-free alternative and sour cream with coconut yogurt.
Keywords: red velvet, chocolate chip, mini loaves, dessert, holiday baking, chocolate, red food coloring


