Dirt Cups Recipe
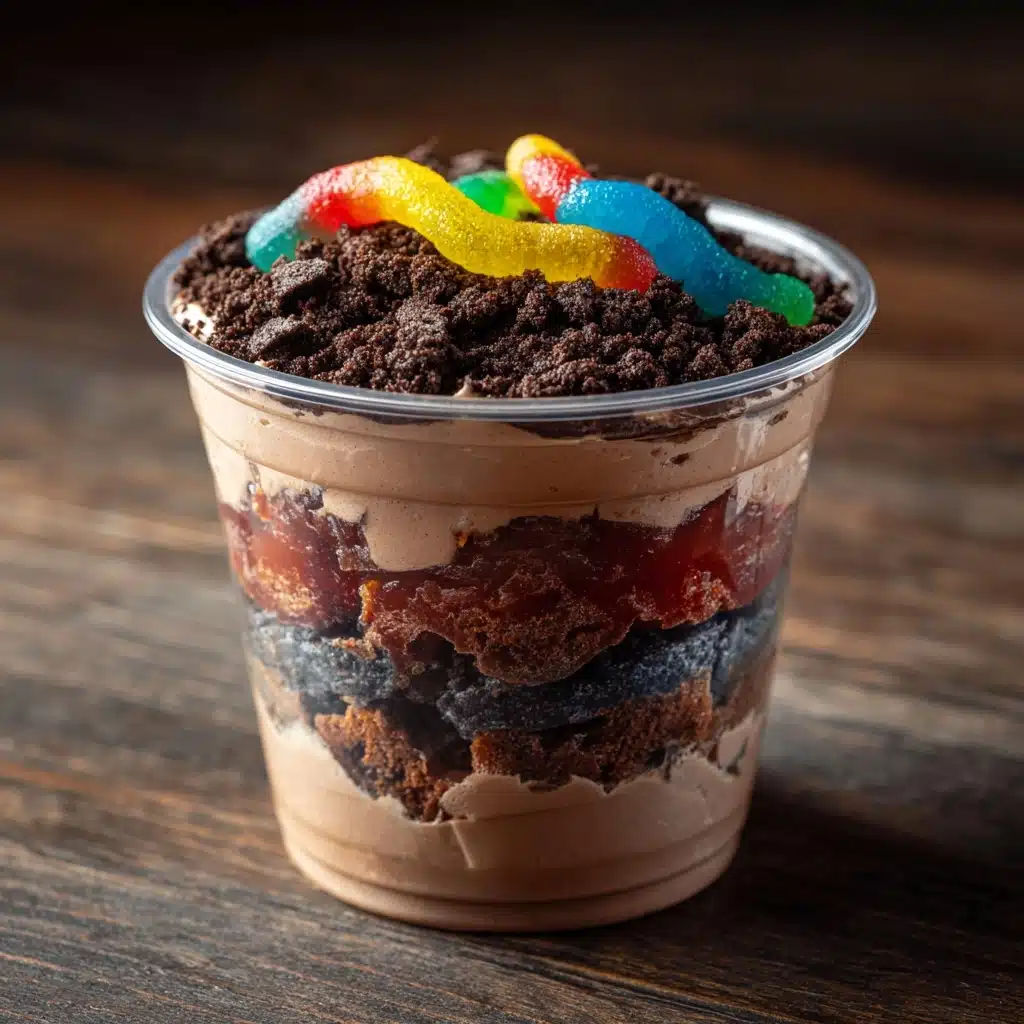
If you’re looking for a playful, crowd-pleasing dessert, Dirt Cups are an absolute winner. These delightful little treats combine creamy chocolate pudding, crunchy cookie crumbs, and a pop of fun from gummy worms to create a dessert that’s as much about nostalgia as it is about flavor. Whether serving at a kid’s party or indulging your inner child, Dirt Cups deliver a perfect harmony of textures and tastes that’ll have everyone asking for seconds.
Ingredients You’ll Need
The beauty of Dirt Cups lies in their simplicity. Each ingredient plays a crucial role—from the rich chocolate pudding that forms the luscious base to the cookie crumbs that add a satisfying crunch, and finally the gummy worms that bring a whimsical charm and a chewy contrast. These basics come together effortlessly to craft a dessert that’s both fun and delicious.
- 16 chocolate sandwich cookies: These crushed Oreos provide the “dirt” texture, adding a crumbly crunch that pairs perfectly with creamy pudding.
- 4 cups cold milk: Essential for mixing the instant pudding, cold milk ensures a smooth, luscious consistency.
- Two 3.4 ounce boxes instant chocolate pudding mix: The star of the show, delivering rich chocolate flavor and creamy texture.
- One 8 ounce tub whipped topping (thawed): Mixing this in makes the pudding extra fluffy and light, giving that irresistible softness.
- 24 gummy worms: These playful candies add color and a chewy contrast that completes the “dirt” illusion perfectly.
How to Make Dirt Cups
Step 1: Crush the Cookies
Start by placing all 16 chocolate sandwich cookies into a large resealable baggie. Using a rolling pin, crush them until they turn into fine crumbs—kind of like the perfect soil for your Dirt Cups. If you want to save time, a food processor works just as well here, but crushing by hand adds a bit of fun to the prep.
Step 2: Prepare the Chocolate Pudding
Grab a large mixing bowl and pour in the 4 cups of cold milk. Sprinkle in both boxes of instant chocolate pudding mix and whisk vigorously until everything is smooth and combined. This thickens quickly, so allow it to rest for about 5 minutes to set into a silky, rich base layer.
Step 3: Fold in the Whipped Topping
Once the pudding has thickened, gently fold in the thawed whipped topping. This creates a light and fluffy texture that contrasts beautifully with the denser pudding and crumbly cookies—your Dirt Cups will have that perfect creamy mouthfeel we all love.
Step 4: Build the Layers
Now it’s time to assemble. Spoon approximately 1/3 cup of the pudding mixture into each of 8 plastic cups, spreading it evenly. Top each cup with a generous heaping tablespoon of the crushed cookie crumbs, sprinkling them carefully so they look like freshly tilled dirt.
Step 5: Repeat for a Second Layer
Repeat the layering process: add another 1/3 cup of pudding mixture followed by another heaping spoonful of crushed cookies. This double-layered approach adds depth and makes each bite a delightful combination of creamy and crunchy textures.
Step 6: Add the Gummy Worms
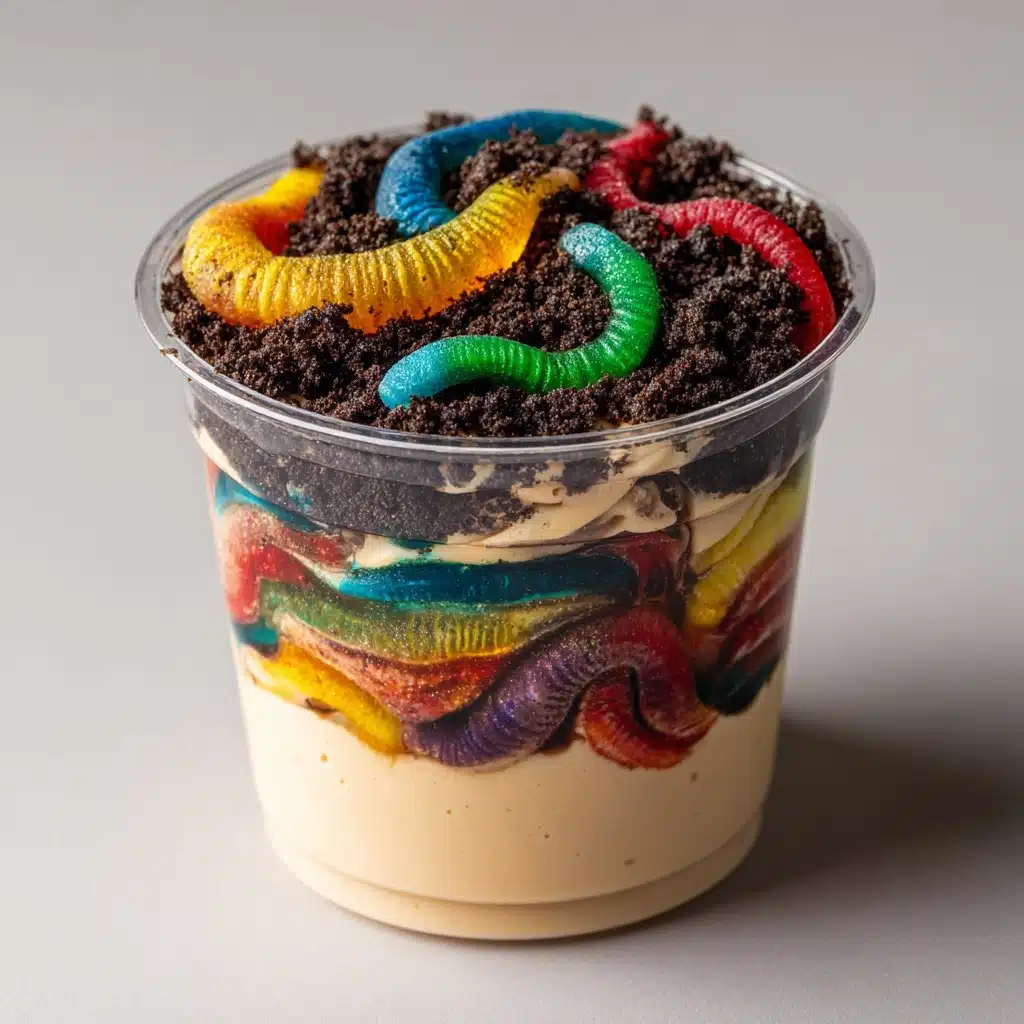
For the grand finale, place three gummy worms on top of each cup, letting some hang over the edges or curl playfully across the surface. These colorful little critters bring a whimsical finish that turns simple Dirt Cups into a guaranteed conversation starter.
How to Serve Dirt Cups
Garnishes
While gummy worms are the classic garnish, feel free to get creative with a few mini chocolate chips, a dusting of cocoa powder, or even edible flowers for a grown-up twist. The contrast of textures and flavors from different toppings adds dimension and visual appeal to your Dirt Cups.
Side Dishes
Dirt Cups are often a standalone treat, but if you’re serving a whole dessert spread, they pair wonderfully with fresh berries or a simple fruit salad to cut through the richness. For a cozy meal, consider offering them alongside warm brownies or vanilla ice cream for an indulgent chocolate experience.
Creative Ways to Present
Consider serving Dirt Cups in clear mini mason jars or glass parfait glasses to showcase the layers beautifully. You could also turn this dessert into a fun DIY station, letting guests assemble their own cups with various toppings, making it interactive and even more enjoyable for kids and adults alike!
Make Ahead and Storage
Storing Leftovers
Dirt Cups keep beautifully when covered and refrigerated for up to 2 days. The pudding holds its creamy texture, while the cookie crumbs stay crunchy if added just before serving. Keep gummy worms sealed separately to maintain their chewiness and add them fresh each time.
Freezing
Since pudding and whipped topping can separate after freezing, Dirt Cups aren’t ideal candidates for freezing. It’s best to enjoy them fresh or within a couple of days stored in the fridge for peak taste and texture.
Reheating
These are meant to be enjoyed chilled, so there’s no need for reheating. In fact, warming Dirt Cups will spoil the luscious layers and soft whipped topping, so save these indulgences for cool, refreshing bites right out of the fridge.
FAQs
Can I use a different type of cookie?
Absolutely! While classic chocolate sandwich cookies work best for that iconic “dirt” look and taste, you can experiment with chocolate chip cookies or graham crackers for a different twist. Just expect a slight change in texture and flavor.
Are Dirt Cups suitable for dietary restrictions?
This recipe isn’t naturally gluten-free or dairy-free, but you can substitute gluten-free cookies, dairy-free milk, and pudding mixes to adapt it. Whipped topping can also be swapped for dairy-free versions to accommodate allergies or preferences.
Can I make Dirt Cups without instant pudding?
Instant pudding really helps the dessert set quickly with the right texture, but you can try homemade chocolate pudding. It just might require longer chilling time and a bit more effort to get the same soft, creamy consistency.
How many servings does this recipe make?
This recipe yields about 8 individual Dirt Cups, making it perfect for small gatherings or family desserts. If you need more, simply double the ingredients to fit your crowd size!
Can I add more layers or different creams?
Yes! Feel free to experiment by adding layers of peanut butter, caramel sauce, or even a layer of crushed nuts. These additions can customize the flavor profile and keep things exciting with your Dirt Cups.
Final Thoughts
Dirt Cups are more than just a dessert—they’re a joyful experience that brings out your playful side and keeps everyone smiling. With minimal effort and a handful of simple ingredients, you create a treat full of texture, flavor, and fun that’s perfect for any occasion. Give these delightful Dirt Cups a try; I promise they’ll become a favorite in your dessert rotation!
PrintDirt Cups Recipe
Dirt Cups are a fun and delicious dessert featuring layers of creamy chocolate pudding and crushed chocolate sandwich cookies, topped with gummy worms for a playful twist. Perfect for parties, kids’ treats, or anytime you crave a sweet and whimsical treat.
- Prep Time: 15 minutes
- Cook Time: 0 minutes
- Total Time: 15 minutes
- Yield: 8 servings 1x
- Category: Dessert
- Method: No Bake
- Cuisine: American
- Diet: Vegetarian
Ingredients
Crust
- 16 chocolate sandwich cookies (e.g., Oreos)
Pudding Layer
- 4 cups cold milk
- Two 3.4 ounce boxes instant chocolate pudding mix
- One 8 ounce tub whipped topping (thawed)
Decoration
- 24 gummy worms
Instructions
- Crush Cookies: Place the chocolate sandwich cookies in a large resealable bag and use a rolling pin to crush them into fine crumbs. Alternatively, pulse them in a food processor. Set aside the cookie crumbs.
- Mix Pudding: In a large mixing bowl, pour the cold milk and whisk in both boxes of instant chocolate pudding mix until smooth. Allow the mixture to set for 5 minutes to thicken properly.
- Combine Whipped Topping: Gently fold in the thawed whipped topping into the pudding mixture until well combined, creating a light and creamy texture.
- First Layer: Spoon about 1/3 cup of the pudding mixture into each of 8 plastic cups to form the first layer.
- Cookie Layer: Sprinkle a heaping tablespoon of crushed Oreos evenly on top of the pudding layer in each cup.
- Second Layer: Add another layer of 1/3 cup pudding mixture on top of the cookie crumbs, then sprinkle the remaining crushed Oreos on this second layer.
- Decorate with Worms: Top each cup with 3 gummy worms to complete the fun dirt cup look. Chill the cups if desired before serving.
Notes
- For extra crunch, slightly crush some cookie crumbs while leaving others finer to add texture.
- You can substitute whipped topping with whipped cream for a fresher flavor.
- These cups can be assembled ahead and refrigerated for up to 4 hours for best texture.
- Use clear cups to better show the layered dirt effect.
- Adults can add a splash of coffee or liqueur to the pudding mixture for a grown-up twist.
Nutrition
- Serving Size: 1 cup
- Calories: 320
- Sugar: 30g
- Sodium: 210mg
- Fat: 15g
- Saturated Fat: 7g
- Unsaturated Fat: 6g
- Trans Fat: 0.2g
- Carbohydrates: 42g
- Fiber: 2g
- Protein: 4g
- Cholesterol: 15mg
Keywords: dirt cups, chocolate pudding dessert, Oreo dessert, gummy worm dessert, no bake dessert, kids dessert
