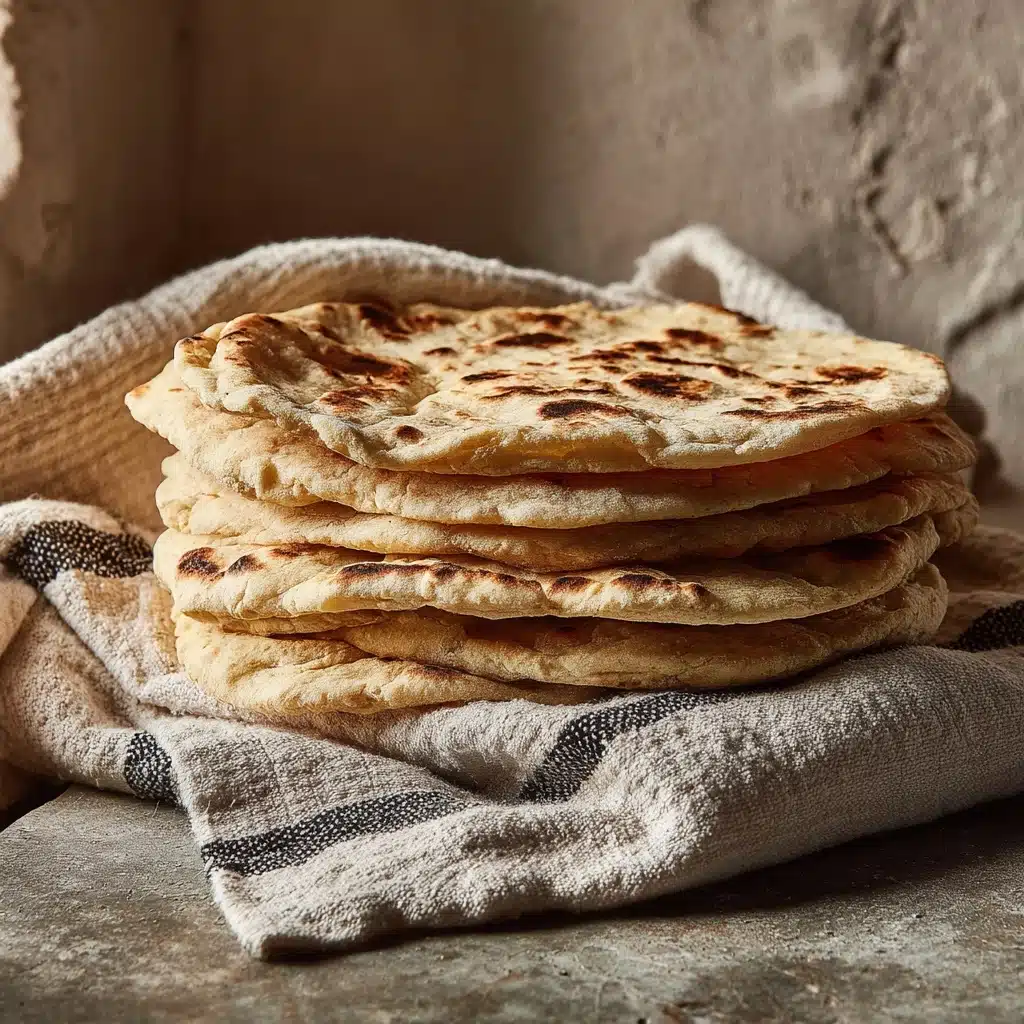
Easy Homemade Pita Bread Recipe
If you’ve ever wanted to fill your kitchen with the irresistible aroma of baking bread, this Easy Homemade Pita Bread Recipe will make your culinary dreams come true. Soft, pillowy, and with the perfect hint of chew, these pitas are miles better than anything out of a bag. Whether you’re stuffing them with your favorite fillings or tearing them into wedges for dips, this recipe comes together with just a handful of ingredients, a bit of patience, and absolutely no special baking skills required. Get ready to impress yourself—and everyone else around the table—with every warm, puffy bite!
Ingredients You’ll Need
It’s honestly astounding how a few everyday ingredients can transform into such incredible bread. Each component plays its own small, vital role in creating pita with just the right flavor and that iconic pocket. Here’s what you’ll need and why each one matters:
- Lukewarm water: The warmth is what kicks the yeast into action, making sure your pita is light and airy.
- Sugar: Just a touch, to wake up the yeast and help the dough rise beautifully.
- Active dry yeast: This is where the magic happens—it’s the key to getting that perfect pocket.
- All-purpose flour: The base of your dough, giving the pita its unforgettable texture; feel free to add a bit more as needed for just the right feel.
- Extra virgin olive oil: Adds flavor and keeps everything moist and tender.
- Salt: Essential for flavor—don’t skimp on this for that classic savory bakery hit.
How to Make Easy Homemade Pita Bread Recipe
Step 1: Activate the Yeast
Start your adventure by adding the lukewarm water, sugar, and yeast to the bowl of your stand mixer, then add 1 cup of flour. Whisk gently until everything is beautifully combined and let it rest for about 15 minutes. You’re looking for happy little bubbles and foam—something that tells you the yeast is wide awake and ready to go!
Step 2: Make the Dough
Pour in the olive oil and salt, followed by 1 1/2 more cups of flour. Mix on low with your dough hook. If the dough is still sticking to the bowl’s sides, don’t worry—just sprinkle in a little more flour (up to 1/2 cup more) until it feels soft but not sticky. This is the foundation of your Easy Homemade Pita Bread Recipe, so a little patience now pays off big time later.
Step 3: Knead the Dough
Let your stand mixer do the heavy lifting here. Knead on low for about 5 to 6 minutes, until the dough comes together in a smooth, supple ball. Then, turn it onto a floured surface and shape it into one tidy ball. This part is oddly satisfying—you’ll really feel like a pro baker!
Step 4: The First Rise
Lightly oil a large bowl and plop your dough inside, rolling it around so it’s coated all over. Cover it with a clean kitchen towel and set aside in a warm spot for about 2 hours. This is where your dough doubles in size and develops all that beautiful flavor.
Step 5: Portion the Dough
When your dough has puffed up like a pillow, move it back onto a floured surface. Shape it into a big ball and cut it into 8 equal pieces. No need for measuring perfection here, but if you like, a kitchen scale will keep things even.
Step 6: Shape Into Balls
Working with each piece, gently pull the dough edges from the top and tuck them under, forming a smooth ball. Place all eight balls about an inch apart on your floured surface, then cover lightly with oiled plastic wrap. Let them rest and relax for 30 minutes—this makes rolling easier and gives the pitas their tender bite.
Step 7: Roll Out the Pitas
Once their nap is over, roll each dough ball into a round disk about 1/4 inch thick. No rolling pin? No problem—your hands will do! Lay them out and let them rest again for 10 to 30 minutes; the extra time helps each pita puff with that signature airy pocket.
Step 8: Cook the Pitas
Brush a cast-iron skillet lightly with olive oil and heat it over medium-high. Cook each pita for about 2 to 3 minutes until you see it puffing and the underside is golden, then flip and cook 2 minutes more. Stack them in a clean towel as you go to keep them warm and soft—this is where the magic of the Easy Homemade Pita Bread Recipe fully comes alive!
Step 9: Enjoy Fresh or Store
Pita bread tastes best right from the pan, but any extra will keep for up to a week in an airtight container at room temperature. You’ll find yourself reaching for another piece before you know it!
How to Serve Easy Homemade Pita Bread Recipe

Garnishes
Sometimes, it’s the simplest touches that make all the difference. Brush your pita with a bit of olive oil and a sprinkling of sea salt or za’atar straight out of the pan for an herby, fragrant finish. Fresh parsley or a light dusting of paprika adds a pop of color and flavor, making each pita bread truly special.
Side Dishes
This Easy Homemade Pita Bread Recipe is a loyal companion to so many dishes—think creamy hummus, smoky baba ganoush, or even a vibrant tabbouleh salad. It’s just the thing for scooping, dipping, and piling high with your favorite Mediterranean or Middle Eastern flavors.
Creative Ways to Present
There’s no need to hold back here: slice your pita into triangles to serve as dippable chips, or use whole rounds to stuff with falafel, shawarma, or crunchy veggies. Try making pita pizza for a fun, customizable twist—kids and adults alike will love it! However you serve it, your homemade pitas are sure to steal the show.
Make Ahead and Storage
Storing Leftovers
If by some miracle you end up with leftover pita, let it cool completely before storing in an airtight container or resealable bag at room temperature. It will stay soft and delicious for five to seven days—perfect for lunchtime sandwiches, quick snacks, or spontaneous mezze platters.
Freezing
Want to save some pita for later? Stack your fully cooled pita breads with a piece of parchment paper between each one, and stash them in a freezer bag. They’ll keep well for up to three months, so you can enjoy the Easy Homemade Pita Bread Recipe anytime a craving strikes!
Reheating
For that just-baked taste, reheat your pita in a warm skillet for a minute or two on each side, or pop it in a 350°F oven for 5 minutes. If you’re in a rush, a quick 10-15 seconds in the microwave will do the trick. Wrap it in a slightly damp paper towel to keep it soft.
FAQs
Do I need a stand mixer to make this Easy Homemade Pita Bread Recipe?
A stand mixer makes life easier, but you can absolutely make this by hand. Stir with a sturdy spoon and knead the dough on a lightly floured surface for about 8-10 minutes. The results will still be fantastic!
Why didn’t my pita bread puff up?
Sometimes pitas don’t form big pockets, and that’s okay! Letting the rolled dough rest longer before cooking helps, as does making sure your skillet is nice and hot. Even if they don’t puff, they’ll still be deliciously soft and chewy.
Can I use whole wheat flour in this Easy Homemade Pita Bread Recipe?
Absolutely! Replace up to half the all-purpose flour with whole wheat flour for a slightly nuttier flavor and more wholesome bite. You may need a bit more water if the dough feels dry, as whole wheat flour absorbs more.
What’s the best way to keep pita bread soft?
As soon as each pita comes off the skillet, wrap it in a clean dish towel. The gentle steam will keep your bread pliable and prevent it from drying out as you finish the batch.
How can I tell when the dough is ready to be shaped?
After the first rise, your dough should feel airy, supple, and roughly doubled in size. If you gently poke it, the indentation should spring back slowly. That’s your sign it’s ready for shaping and rolling!
Final Thoughts
I can’t recommend this Easy Homemade Pita Bread Recipe enough—it’s a pure joy to make and even more fun to eat. There’s just something so satisfying about watching your own bread puff up on the stove and knowing you made it from scratch. Set aside a little time, give it a try, and I promise you won’t look at store-bought pita the same way again! Happy baking!
PrintEasy Homemade Pita Bread Recipe

Learn how to make delicious homemade pita bread with this easy recipe. Soft and slightly chewy, these pitas are perfect for stuffing with your favorite fillings or enjoying on their own.
- Prep Time: 30 minutes
- Cook Time: 15 minutes
- Total Time: 3 hours
- Yield: 8 pitas 1x
- Category: Bread
- Method: Baking
- Cuisine: Mediterranean
- Diet: Vegetarian
Ingredients
For the Pita Bread:
- 1 cup (8 oz.) lukewarm warm water (about 105–110°F)
- 1 tablespoon sugar
- 2 1/4 teaspoons (1 package) active dry active yeast
- ~3 cups all-purpose flour (or enough to form a soft and slightly sticky dough)
- 1 tablespoon extra virgin olive oil
- 1 3/4 teaspoons salt
Instructions
- Making the Dough: Add warm water, sugar, and yeast to a stand mixer bowl with 1 cup of flour. Let it sit for 15 minutes until bubbly.
- Adding Ingredients: Mix in olive oil, salt, and 1 1/2 cups of flour. Knead until soft, adding more flour if needed.
- Kneading the Dough: Knead on low for 5 to 6 minutes, then form the dough into a ball and let it rise for 2 hours.
- Shaping the Pitas: Divide the dough, form balls, and let rest for 30 minutes. Roll out into flat pitas and let rest again.
- Cooking the Pitasa: Cook the pitas in a skillet until they puff up and brown, about 2-3 minutes per side.
Notes
- For best results, ensure the water temperature is accurate for activating the yeast.
- Allowing the dough to rest at various stages helps develop flavor and texture.
- Adjust cooking time based on your skillet and desired level of browning.
Nutrition
- Serving Size: 1 pita
- Calories: 180
- Sugar: 2g
- Sodium: 300mg
- Fat: 2g
- Saturated Fat: 0g
- Unsaturated Fat: 2g
- Trans Fat: 0g
- Carbohydrates: 35g
- Fiber: 2g
- Protein: 5g
- Cholesterol: 0mg
Keywords: homemade pita bread, easy pita bread recipe, Mediterranean bread recipe


