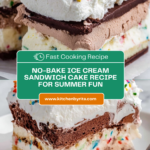
Ice Cream Sandwich Cake with Hot Fudge and Sprinkles Recipe
Introduction
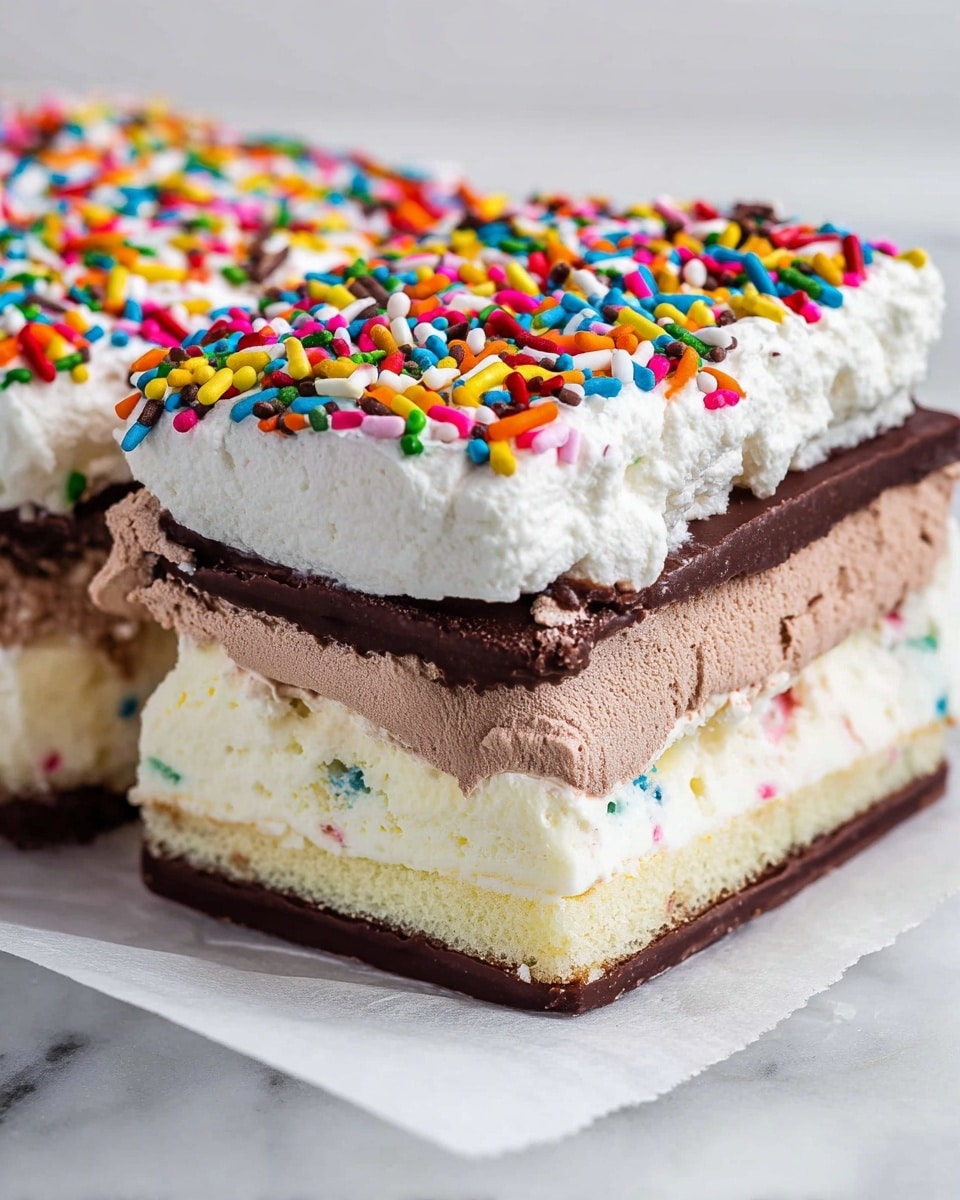
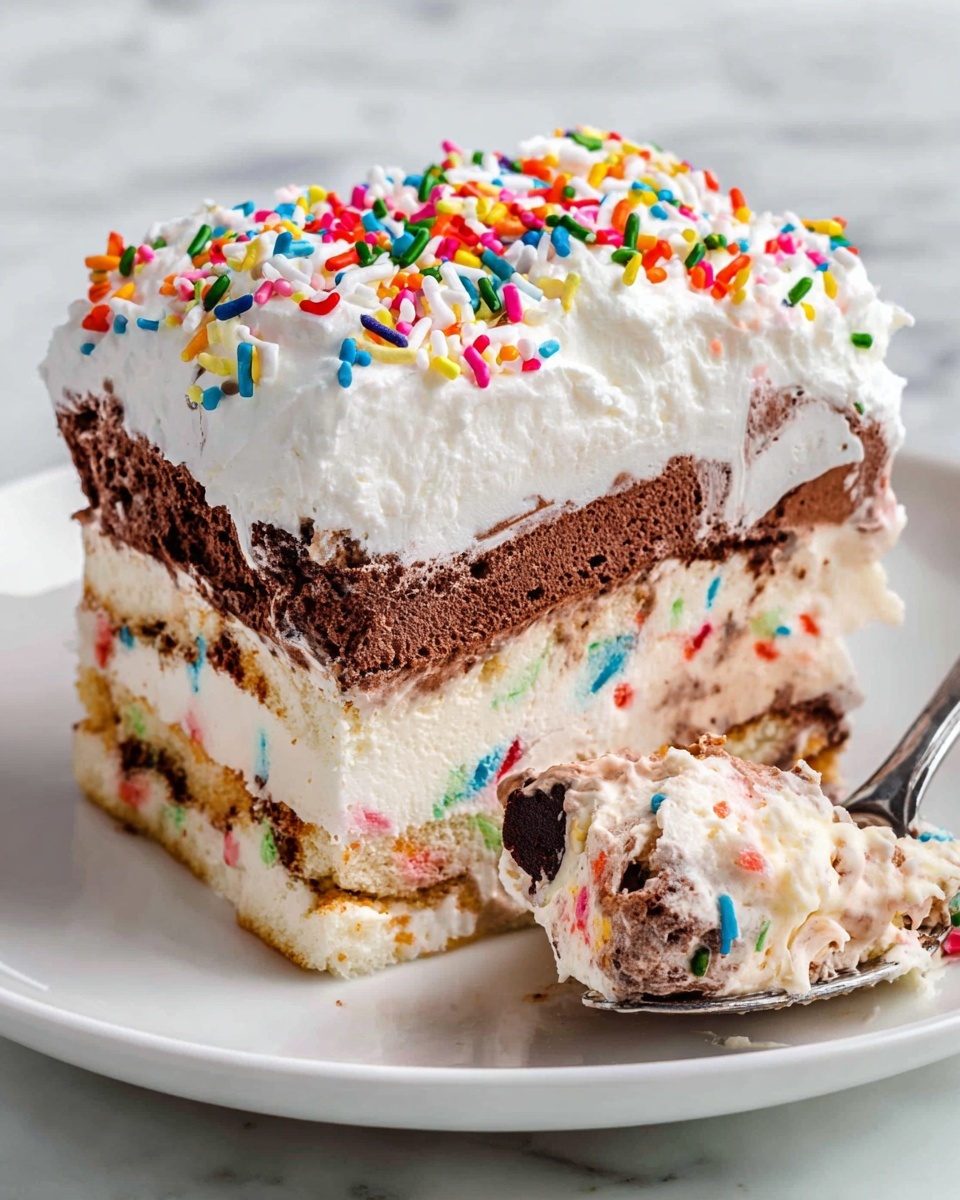
This Ice Cream Sandwich Cake is a fun and easy no-bake dessert that combines creamy chocolate pudding, cool whipped topping, and classic vanilla ice cream sandwiches. Perfect for warm days or special occasions, it layers rich flavors and playful sprinkles for a treat everyone will love.
Ingredients
- 1 (3.9 oz) instant chocolate pudding mix
- 1 Tablespoon unsweetened cocoa powder
- 1 cup half-and-half
- 16 oz Cool Whip (thawed and divided)
- ½ cup rainbow sprinkles
- 19 vanilla ice cream sandwiches (regular size)
- ½ cup hot fudge topping (at room temperature, do not warm up, divided)
- Optional toppings: additional sprinkles, M&Ms, chopped-up candy bars, caramel sauce, chocolate sauce, etc.
Instructions
- Step 1: Line a 9 x 13 inch baking dish with parchment paper and set aside.
- Step 2: In a medium bowl, whisk together the instant pudding mix and cocoa powder. Add half-and-half and stir until the mixture thickens. Fold in half of the Cool Whip (8 ounces) and the rainbow sprinkles. Set this chocolate mixture aside.
- Step 3: Arrange a single, even layer of ice cream sandwiches on the bottom of the prepared dish. Trim sandwiches as needed to cover the bottom completely with no large gaps.
- Step 4: Spread ¼ cup of the hot fudge evenly over the ice cream sandwiches.
- Step 5: Spread the chocolate pudding mixture into an even layer over the fudge.
- Step 6: Place the dish in the freezer for at least 20 minutes to let the layers firm up and prevent the sandwiches from sinking into the pudding.
- Step 7: Remove from the freezer and add a second layer of ice cream sandwiches over the chocolate mixture. Drizzle with another ¼ cup of hot fudge.
- Step 8: Spread the remaining Cool Whip over the top layer evenly.
- Step 9: Freeze the entire cake until firm, at least 2 hours.
- Step 10: Before serving, add additional sprinkles and optional toppings like chopped candy bars or caramel drizzle. Slice and serve immediately.
Tips & Variations
- If you prefer a more chocolate-forward dessert, add a drizzle of chocolate sauce between layers or substitute chocolate ice cream sandwiches.
- For easier slicing, let the cake sit at room temperature for a few minutes before cutting.
- Use a serrated knife to cut clean slices without squishing the layers.
- Swap rainbow sprinkles for crushed nuts or cookie crumbs for different textures.
Storage
Store the cake covered in the freezer for up to 5 days. Re-freeze after serving any portion. To serve, let the cake sit at room temperature for about 10 minutes for easier slicing and a softer texture.
How to Serve
Serve this delicious recipe with your favorite sides.
FAQs
Can I make this cake ahead of time?
Yes, this cake is perfect for making in advance. Just assemble, freeze until firm, and add toppings right before serving.
What size baking dish should I use?
A 9 x 13 inch dish works best to fit the layers evenly and hold the cake’s shape.
PrintIce Cream Sandwich Cake with Hot Fudge and Sprinkles Recipe

This Ice Cream Sandwich Cake is a delightful no-bake dessert that layers classic vanilla ice cream sandwiches with rich chocolate pudding, creamy Cool Whip, and hot fudge sauce. Topped with colorful sprinkles and optional candy additions, it’s a fun and easy treat perfect for summer gatherings or any celebration.
- Prep Time: 20 minutes
- Cook Time: 0 minutes
- Total Time: 2 hours 20 minutes
- Yield: 12 servings 1x
- Category: Dessert
- Method: No-Cook
- Cuisine: American
Ingredients
Pudding Mixture
- 1 (3.9 oz) instant chocolate pudding mix
- 1 Tablespoon unsweetened cocoa powder
- 1 cup half-and-half
- 8 oz Cool Whip (half of the 16 oz, thawed)
- ½ cup rainbow sprinkles
Other Ingredients
- 16 oz Cool Whip (thawed, divided)
- 19 vanilla ice cream sandwiches (regular size)
- ½ cup hot fudge topping (at room temperature, divided)
- Optional toppings: additional sprinkles, M&Ms, chopped candy bars, caramel sauce, chocolate sauce, etc.
Instructions
- Prepare the baking dish: Line a 9 x 13 inch baking dish with parchment paper and set aside to ensure easy removal of the cake later.
- Make the chocolate pudding mixture: In a medium bowl, whisk the instant chocolate pudding mix and unsweetened cocoa powder together. Slowly add the half-and-half and mix until the pudding thickens. Fold in half of the Cool Whip (8 ounces) along with the rainbow sprinkles gently until well combined. Set aside.
- Layer ice cream sandwiches: Arrange a single, even layer of ice cream sandwiches on the bottom of the prepared dish. Trim the sandwiches as necessary to cover the entire bottom without large gaps; typically, this will be about 2 rows of 4 sandwiches plus one and a third sandwiches.
- Add fudge layer: Spread ¼ cup of the room temperature hot fudge evenly over the ice cream sandwiches to create a rich chocolate layer.
- Spread the pudding mixture: Pour and spread the prepared chocolate pudding mixture evenly over the fudge layer to create the next layer of the cake.
- Freeze briefly: Place the dish in the freezer for at least 20 minutes to allow the pudding mixture to firm up enough to support the next layers without sinking.
- Repeat layers: Remove the dish from the freezer and add a second layer of ice cream sandwiches on top of the pudding layer. Spread the remaining hot fudge sauce (about ¼ cup) evenly over these sandwiches.
- Top with Cool Whip: Finally, spread the remaining Cool Whip evenly over the entire cake to create a smooth, creamy topping.
- Freeze until firm: Return the entire cake to the freezer and chill for at least 2 hours or until firm enough to slice cleanly.
- Add optional toppings and serve: Before serving, decorate the cake with additional sprinkles and any other desired toppings such as M&Ms, chopped candy bars, caramel drizzle, or chocolate sauce. Slice and serve immediately for the best texture.
Notes
- The baking dish should be lined with parchment paper to make removal of the cake easier and cleaner.
- Do not warm the hot fudge topping; use it at room temperature for easy spreading.
- Trim the ice cream sandwiches to ensure full coverage without gaps to maintain neat layers.
- Freezing between layers helps maintain distinct layers and prevents sinking.
- This dessert is best served immediately after slicing to preserve the texture of the ice cream sandwiches.
Keywords: Ice Cream Sandwich Cake, No-Bake Dessert, Chocolate Pudding Cake, Frozen Dessert, Summer Dessert

