Protein Cheesecake Recipe
Introduction
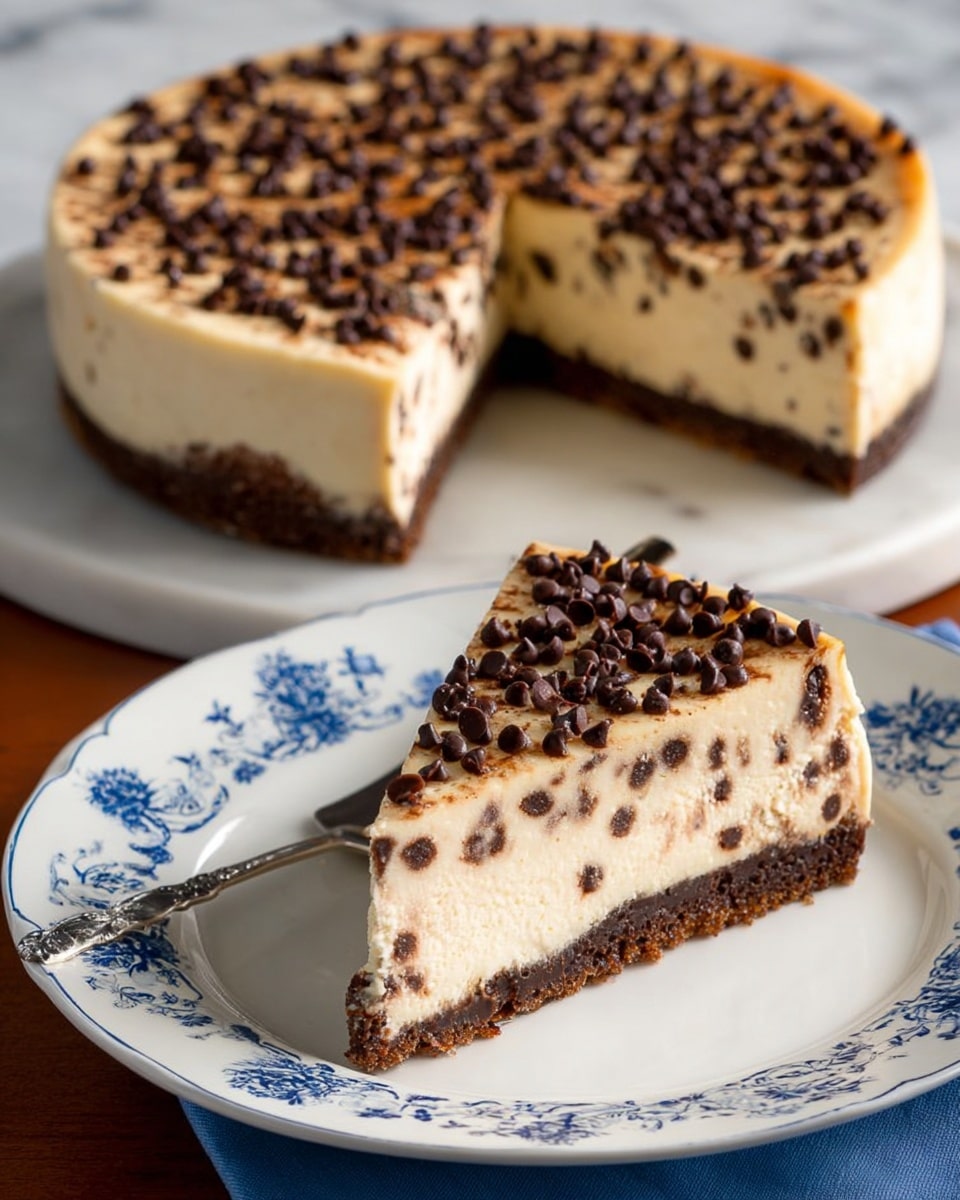
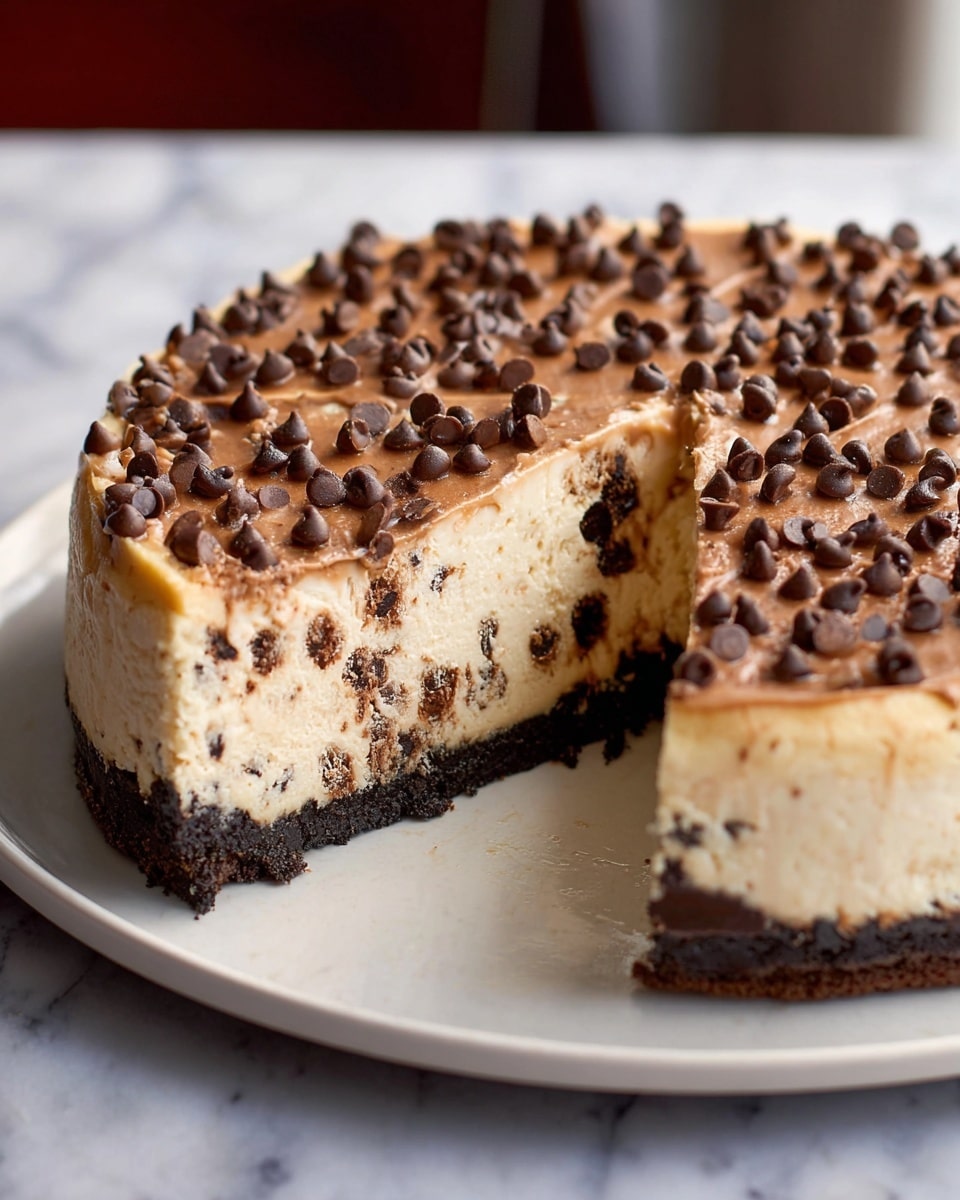
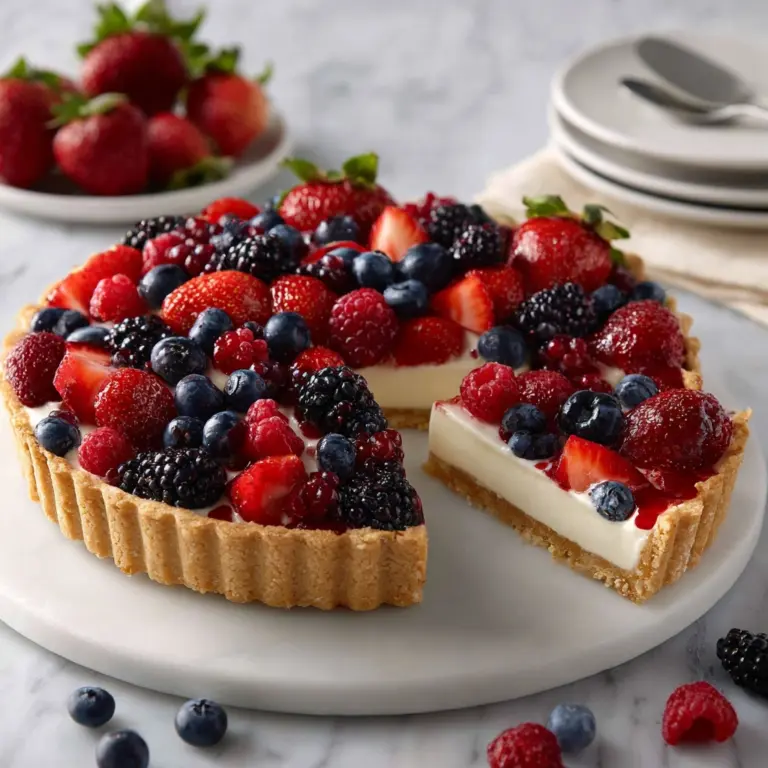
This protein cheesecake is a deliciously creamy dessert that combines the richness of traditional cheesecake with the added benefit of protein. Perfect for those looking to satisfy a sweet tooth while keeping nutrition in mind, this recipe is simple to prepare and versatile enough for various dietary needs.
Ingredients
- 24 oz cream cheese (or vegan cream cheese)
- 2 cups Greek yogurt (or dairy free alternative)
- 1/2 cup protein powder
- 2/3 cup sweetener of choice
- 2 1/2 tsp pure vanilla extract
- Crust of choice (optional)
Instructions
- Step 1: Preheat your oven to 350°F. Fill any baking pan about two-thirds full with water and place it on the lower rack of the oven to create a water bath.
- Step 2: Bring the cream cheese to room temperature for easier mixing. Prepare your crust of choice in a 9-inch springform pan if using one.
- Step 3: In a food processor, blender, or with beaters, combine the cream cheese, Greek yogurt, protein powder, sweetener, and vanilla extract. Mix just until smooth and well combined.
- Step 4: Spread the cheesecake filling evenly into the springform pan. Place the pan on the center rack of the oven, above the water bath.
- Step 5: Bake for 30 minutes, then turn off the oven without opening the door. Let the cheesecake sit inside the oven for an additional five minutes to continue cooking gently.
- Step 6: Remove the cheesecake and allow it to cool at room temperature. Once cooled, refrigerate for at least six hours to let it firm up fully before serving.
Tips & Variations
- Use a water bath in the oven to add moisture and prevent cracks in your cheesecake.
- For a dairy-free version, substitute cream cheese and Greek yogurt with vegan alternatives and choose a plant-based protein powder.
- Feel free to swap the sweetener for honey, maple syrup, or a sugar-free option according to your preference.
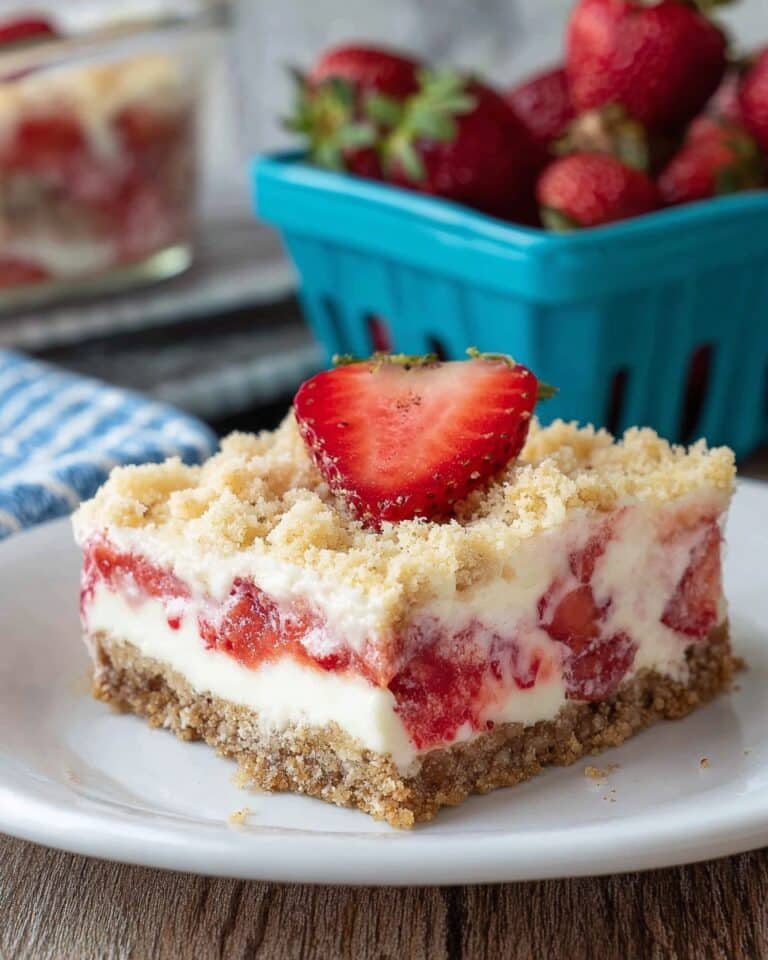
- Try adding fresh fruit or a berry compote on top for extra flavor and color.
Storage
Store the cheesecake covered in the refrigerator for up to 5 days. To keep it fresh longer, wrap it well with plastic wrap or foil. When ready to serve, it can be eaten chilled or allowed to sit at room temperature for 15-20 minutes for a creamier texture. Avoid freezing as it may alter the texture.
How to Serve
Serve this delicious recipe with your favorite sides.
FAQs
Can I make this cheesecake without a crust?
Yes, you can omit the crust for a lighter, crustless cheesecake. Just pour the filling directly into a greased springform pan.
What type of protein powder works best?
Any unflavored or vanilla-flavored protein powder works well. Whey, plant-based, or collagen powders can all be used depending on your dietary needs and taste preferences.
PrintProtein Cheesecake Recipe

This Protein Cheesecake recipe offers a creamy, high-protein dessert option that combines cream cheese and Greek yogurt with protein powder for added nutritional benefits. Baked gently with a water bath for a smooth texture and crack-free finish, it can be customized with your favorite crust and easily adjusted to be vegan or dairy-free with simple substitutions.
- Prep Time: 15 minutes
- Cook Time: 30 minutes
- Total Time: 6 hours 45 minutes
- Yield: 8 servings 1x
- Category: Dessert
- Method: Baking
- Cuisine: American
Ingredients
Filling
- 24 oz cream cheese (or vegan cream cheese)
- 2 cups Greek yogurt (or dairy free alternative)
- 1/2 cup protein powder
- 2/3 cup sweetener (of choice)
- 2 1/2 tsp pure vanilla extract
Optional Crust
- Choose your preferred crust: graham cracker crust, nut-based crust, or gluten-free crust (not included in ingredient quantity)
Instructions
- Preheat Oven and Prepare Water Bath: Preheat your oven to 350°F (175°C). Fill any baking pan about two thirds full with water and place it on the oven’s lowest rack. This water bath will provide moisture during baking to help prevent cracks in the cheesecake.
- Prepare Cream Cheese and Crust: Let the cream cheese come to room temperature for easier blending. Prepare your chosen crust in a 9-inch springform pan if using one.
- Mix Filling: In a food processor, blender, or using beaters, combine the cream cheese, Greek yogurt, protein powder, sweetener, and vanilla extract. Beat just until smooth and well blended, avoiding overmixing to prevent cracking.
- Assemble and Bake: Pour the filling into the springform pan over the prepared crust. Place the pan on the center rack of the oven above the water bath. Bake for 30 minutes at 350°F.
- Turn Off Oven and Rest: After baking, turn off the oven without opening the door. Allow the cheesecake to sit undisturbed inside for an additional 5 minutes to slowly finish baking with residual heat.
- Cool and Chill: Remove the cheesecake from the oven and let it cool to room temperature on the counter. Once cooled, place it in the refrigerator for at least six hours (preferably overnight) to let it firm up before serving.
Notes
- The water bath technique helps maintain moisture and prevents cracks on the surface.
- Using room temperature cream cheese ensures a smoother batter without lumps.
- Substitute vegan cream cheese and dairy-free yogurt for a vegan or dairy-free version.
- The resting period after baking and gradual cooling are key to maintaining cheesecake texture.
- Choose crust options based on dietary preference or omit crust altogether for a crustless version.
Keywords: Protein cheesecake, healthy cheesecake, high protein dessert, baked cheesecake, low sugar dessert, Greek yogurt cheesecake, protein powder dessert


