Stained Glass Cookies Recipe
Introduction
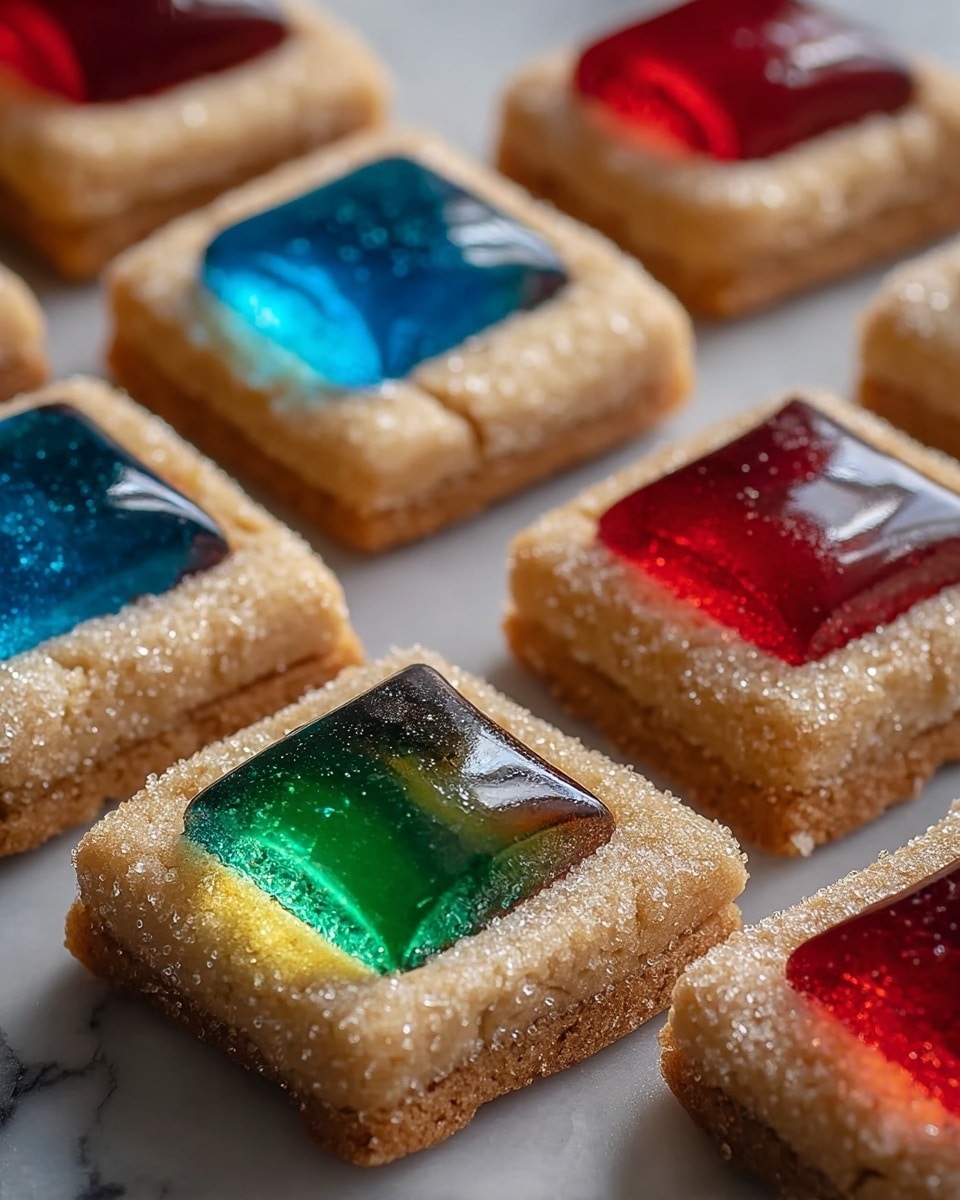
Stained Glass Cookies are a delightful treat that combines buttery sugar cookies with colorful, melted candy centers. These festive cookies are perfect for holidays or any time you want a beautiful, eye-catching dessert.
Ingredients
- ¾ cup (170 g) unsalted butter, softened
- ½ cup (100 g) granulated sugar
- ¼ cup (50 g) light brown sugar
- 1 large egg
- 1 teaspoon vanilla extract
- 2 cups (250 g) all-purpose flour
- ½ teaspoon baking powder
- ¼ teaspoon salt
- Assorted hard candies (like Jolly Ranchers or Life Savers), crushed into small pieces
Instructions
- Step 1: Preheat your oven to 350°F (175°C) and line baking sheets with parchment paper.
- Step 2: In a large bowl, cream together the softened butter, granulated sugar, and light brown sugar until the mixture is light and fluffy.
- Step 3: Add the egg and vanilla extract to the butter mixture and mix until well combined.
- Step 4: In a separate bowl, whisk together the flour, baking powder, and salt. Gradually add the dry ingredients to the wet ingredients, mixing until a soft dough forms.
- Step 5: Divide the dough in half, shape each half into a disk, and refrigerate for 30 minutes to make rolling easier.
- Step 6: On a lightly floured surface, roll out one disk of dough to about ¼ inch thickness. Use large cookie cutters to cut out shapes, then use smaller cutters to remove the centers.
- Step 7: Transfer the cutouts to the prepared baking sheets. Fill the center of each cookie with a small amount of crushed hard candy, keeping it contained within the cut-out area.
- Step 8: Bake for 8 to 10 minutes, or until the edges are just turning golden and the candy centers have completely melted.
- Step 9: Let the cookies cool completely on the parchment paper before moving them, allowing the candy centers to harden and set.
Tips & Variations
- Use different colored candies to create vibrant patterns and mix flavors in one batch.
- For extra sparkle, sprinkle a little coarse sugar on the edges before baking.
- If smaller candies are unavailable, pulse larger candies briefly in a food processor to crush them evenly.
- Make sure to keep the candy centered so it doesn’t overflow during baking.
Storage
Store the cooled stained glass cookies in an airtight container at room temperature for up to one week. They are best enjoyed within a few days to keep the candy center crisp. If needed, you can re-crisp the candy centers briefly in a low oven (around 250°F) for a few minutes, but avoid overheating.
How to Serve

Serve this delicious recipe with your favorite sides.
FAQs
Can I use a different type of candy?
Yes, any hard candy that melts well, such as Jolly Ranchers or Life Savers, works best. Avoid soft or chewy candies as they won’t harden properly.
How can I prevent the candy from sticking to the parchment paper?
Make sure to use parchment paper and allow the cookies to cool completely on the baking sheet. The candy hardens as it cools, making the cookies easy to remove without sticking.
PrintStained Glass Cookies Recipe
Stained Glass Cookies are delightful sugar cookies featuring colorful, melted candy centers that resemble stained glass windows. These festive treats are perfect for holidays and special occasions, combining buttery, soft cookie dough with vibrant, melted candy for a beautiful and tasty finish.
- Prep Time: 20 minutes
- Cook Time: 10 minutes
- Total Time: 1 hour
- Yield: 24 cookies 1x
- Category: Dessert
- Method: Baking
- Cuisine: American
- Diet: Vegetarian
Ingredients
Cookie Dough
- ¾ cup (170 g) unsalted butter, softened
- ½ cup (100 g) granulated sugar
- ¼ cup (50 g) light brown sugar
- 1 large egg
- 1 teaspoon vanilla extract
- 2 cups (250 g) all-purpose flour
- ½ teaspoon baking powder
- ¼ teaspoon salt
Filling
- Assorted hard candies (like Jolly Ranchers or Life Savers), crushed into small pieces
Instructions
- Preheat Oven: Preheat your oven to 350°F (175°C) and line baking sheets with parchment paper to prevent sticking and to facilitate easy removal of cookies after baking.
- Cream Butter and Sugars: In a large bowl, cream together the softened butter, granulated sugar, and light brown sugar until the mixture is light and fluffy, ensuring a smooth cookie texture.
- Add Egg and Vanilla: Mix in the large egg and vanilla extract until fully incorporated, which helps bind the dough and adds flavor.
- Combine Dry Ingredients: In a separate bowl, whisk together the all-purpose flour, baking powder, and salt to distribute the leavening and seasoning evenly.
- Make Dough: Gradually add the dry ingredients to the wet mixture, mixing until a soft dough forms. Avoid overmixing to keep the cookies tender.
- Chill Dough: Divide the dough in half and flatten each half into a disk. Refrigerate for 30 minutes to make rolling easier and prevent spreading during baking.
- Roll and Cut: On a lightly floured surface, roll each dough disk to about ¼ inch thickness. Use large cookie cutters to cut shapes, then use smaller cutters to remove the centers, creating a window effect.
- Fill Centers: Arrange the cookies on the prepared baking sheets. Fill each cut-out center with a small amount of crushed hard candies, keeping the candy contained within the window area.
- Bake: Bake the cookies in the preheated oven for 8 to 10 minutes, or until the edges begin to turn golden and the candy centers have fully melted, creating a stained glass effect.
- Cool Cookies: Allow the cookies to cool completely on the parchment paper before moving them. This cooling step permits the melted candy centers to harden and set properly within the cookie frames.
Notes
- Ensure the candies are crushed into small pieces for even melting and to prevent sharp edges in the final cookie.
- Use parchment paper to avoid sticking and ease of cleanup.
- To store, keep the cookies in an airtight container at room temperature for up to 5 days to preserve freshness.
- Be careful when handling the cookies right out of the oven, as the melted candy centers will be hot and soft.
- For added color variety, use different candy flavors and colors in each cookie center.
Keywords: stained glass cookies, sugar cookies, festive cookies, holiday cookies, peppermint candy cookies, colorful cookies

