Taiyaki (Japanese Fish Dessert) Recipe
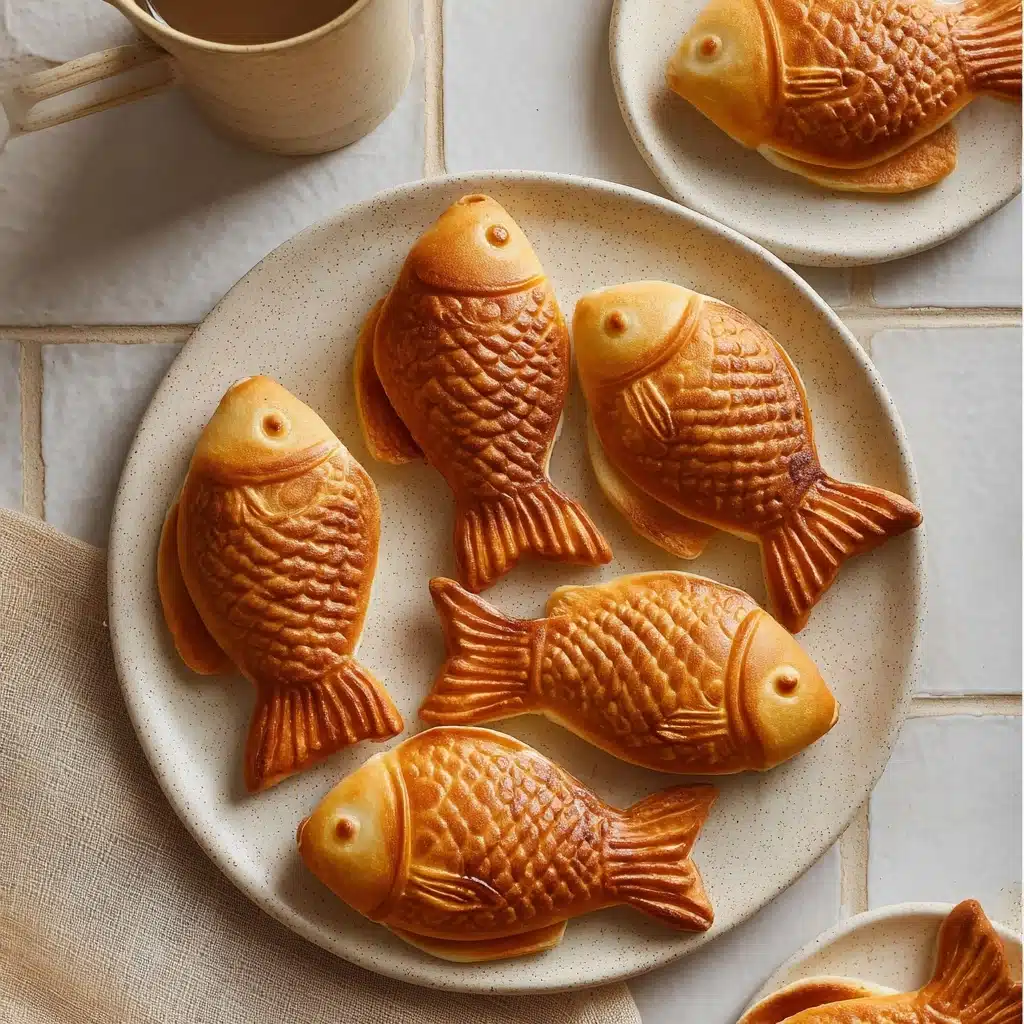
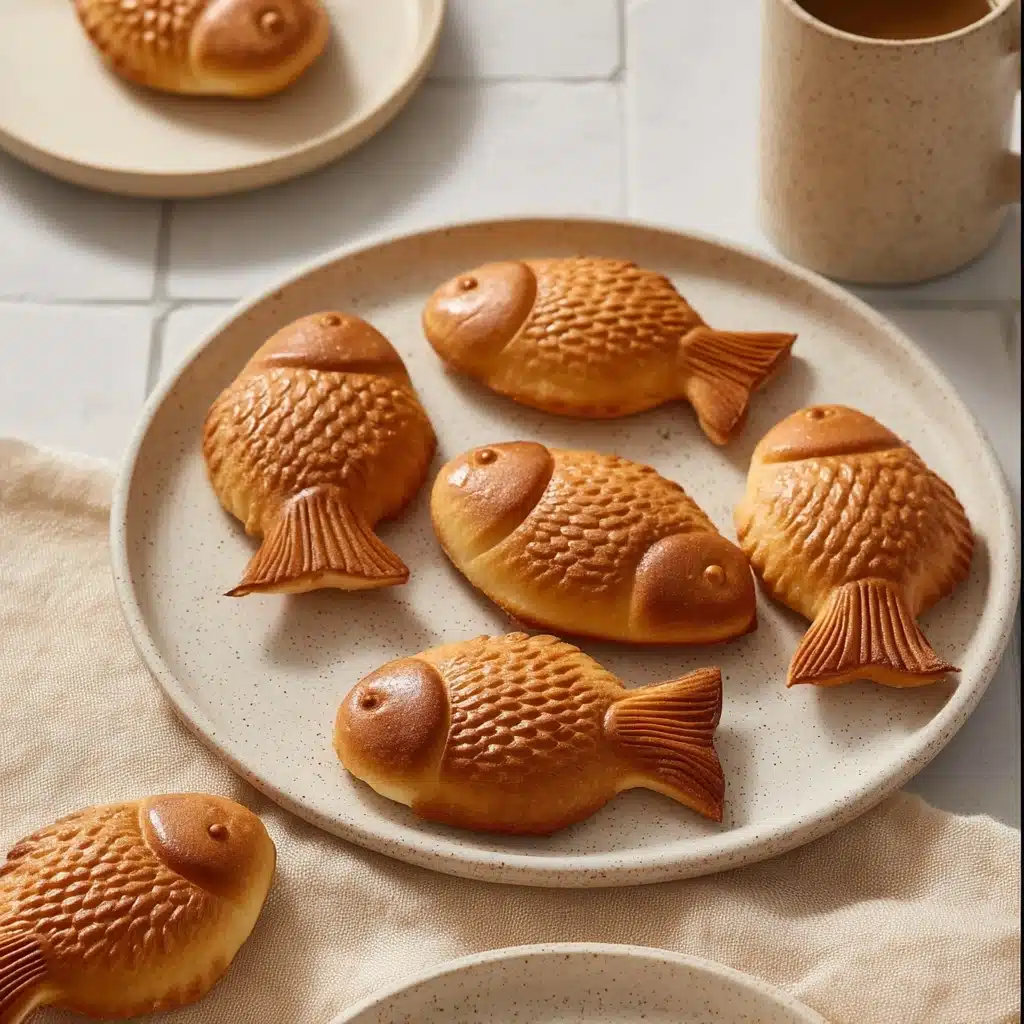
If you have a soft spot for delightful, whimsical treats, then Taiyaki (Japanese Fish Dessert) will absolutely steal your heart. This beloved Japanese favorite is a warm, fluffy fish-shaped cake filled with your choice of sweet or savory fillings like classic red bean paste, Nutella, or even custard. The magic lies in its perfectly crisp exterior contrasting with the tender interior that wraps around the luscious filling, making every bite a joyous surprise. Once you get the hang of making Taiyaki (Japanese Fish Dessert) at home, it quickly becomes a comfort food you crave again and again.

Ingredients You’ll Need
Making Taiyaki (Japanese Fish Dessert) is surprisingly straightforward, and the ingredients list reflects that simplicity. Each element plays a crucial role, whether it’s creating the delicate cake-like texture, balancing sweetness, or delivering that golden-brown color that makes these fish-shaped treats so inviting.
- Cake flour (1 1/4 cup / 150 g): The key to a tender, light batter with a soft crumb texture perfect for wrapping around fillings.
- Granulated sugar (1/4 cup / 50 g): Adds just the right amount of sweetness to complement a variety of fillings without overwhelming them.
- Baking powder (1 teaspoon / 5 g): Provides gentle leavening to give the Taiyaki a nice rise and fluffiness.
- Baking soda (1 teaspoon / 5 g): Helps create a perfect golden crust and balances acidity.
- Salt (1/4 teaspoon): Enhances all the flavors and adds depth to the batter.
- Large egg (1): Binds ingredients together and lends structure with richness.
- Whole milk (3/4 cup): Keeps the batter moist and tender while adding a subtle creaminess.
- Vegetable oil (1 tablespoon / 15 g): Ensures the Taiyaki doesn’t stick to the pan and maintains moistness.
- Vanilla extract (1/2 teaspoon): Gives a warm, inviting aroma and touch of sweetness to the batter.
- Filling, about 3/4 cup: Choose your favorite—red bean paste for an authentic experience, Nutella for chocolate lovers, custard for silky smoothness, or even cheese for a savory twist.
How to Make Taiyaki (Japanese Fish Dessert)
Step 1: Prepare the Dry Ingredients
Start by sifting the cake flour, granulated sugar, baking powder, baking soda, and salt together in a large bowl. This ensures airiness and an even distribution of leavening agents, which is crucial to achieving that light fairy-tale texture Taiyaki is known for.
Step 2: Mix the Wet Ingredients
In a separate bowl, whisk the egg, whole milk, vegetable oil, and vanilla extract until they blend seamlessly. This step adds moisture and richness, setting the foundation for a batter that’s smooth and luscious without being too dense.
Step 3: Combine Wet and Dry
Pour the wet mixture into the dry ingredients and gently whisk together. Don’t worry if a few lumps remain; over-mixing can toughen the batter. Cover the bowl and refrigerate for a minimum of one hour. This resting period lets the batter hydrate fully, resulting in a tender, flavorful cake.
Step 4: Preheat and Prep the Taiyaki Pan
Warm up your Taiyaki pan on medium-low heat. Lightly brush both sides of the mold with a neutral oil and wipe away excess with a paper towel. This ensures your beautiful fish cakes release easily without burning or sticking—a small step that makes all the difference.
Step 5: Fill the Mold with Batter and Filling
Give your batter a quick stir, then pour it into a measuring cup with a spout for easy pouring. Fill the fish molds about 60% full, leaving the tail area open. Add about one tablespoon of your chosen filling right in the center—using a piping bag makes this so much neater and helps avoid overfilling. Then pour additional batter to cover the filling completely, filling the rest of the fish tail section.
Step 6: Cook Your Taiyaki
Close the mold and immediately flip it over so the batter spreads evenly. Cook each side for approximately 2 to 3 minutes until they turn a gorgeous golden brown. When done, transfer your Taiyaki (Japanese Fish Dessert) to a wire rack to cool slightly—this helps retain crispiness. Trim any excess batter with scissors for that perfect fish silhouette, then repeat until all your batter and fillings are used up. The aroma and warmth make it hard to wait before digging in!
How to Serve Taiyaki (Japanese Fish Dessert)

Garnishes
Freshly cooked Taiyaki are fantastic on their own, but you can elevate the presentation with a light dusting of powdered sugar or a drizzle of sweetened condensed milk. Toasted sesame seeds or a sprinkle of matcha powder add an authentic Japanese flair and a delicate crunch.
Side Dishes
Pairing your Taiyaki with a soothing cup of green tea or a refreshing matcha latte complements the sweetness and cuts through the richness, creating a balanced and satisfying snack experience. For a more substantial treat, serve alongside fresh fruit slices or a scoop of vanilla ice cream.
Creative Ways to Present
Imagine offering a Taiyaki platter with a variety of fillings, letting everyone sample different flavors in one sitting—it’s a guaranteed crowd-pleaser. For parties or special occasions, consider mini Taiyaki bites stacked on decorative platters or even filled with savory ingredients like cheese and herbs for a surprising twist on this traditional favorite.
Make Ahead and Storage
Storing Leftovers
If you happen to have leftovers, store them in an airtight container at room temperature for up to a day. Taiyaki is best enjoyed fresh to appreciate its crisp exterior, but proper storage helps preserve some of its charm for the next day.
Freezing
For longer storage, you can freeze Taiyaki by wrapping each piece individually in plastic wrap and placing them in a freezer-safe bag or container. They will keep well for up to one month without losing flavor, allowing you to enjoy this treat on demand.
Reheating
To revive the delightful crispness, reheat frozen or stored Taiyaki in a toaster oven or regular oven at a moderate temperature for 5 to 7 minutes. Avoid microwaving as it tends to make the exterior soggy and less enjoyable. Reheating this way brings back the original texture, making it feel freshly made.
FAQs
What fillings work best for Taiyaki (Japanese Fish Dessert)?
The classic filling is sweet red bean paste, but you can get creative with Nutella, custard, chocolate, cheese, or even savory options like sweet potato or sausage. The key is to use fillings that hold up well under heat and complement the delicate cake.
Do I need a special pan to make Taiyaki at home?
Yes, a Taiyaki pan or mold is essential for shaping the fish design and cooking both sides evenly. These pans can be found online or at specialty Asian markets and come in electric or stovetop versions.
Can I make the batter ahead of time?
Absolutely! Resting the batter in the refrigerator for at least an hour is recommended as it improves texture and flavor. You can even prepare it the day before for added convenience.
How do I prevent the Taiyaki from sticking to the pan?
Brushing both sides of the Taiyaki mold lightly with vegetable oil and wiping off excess before each batch helps prevent sticking. Also, make sure the pan is adequately preheated but not too hot to avoid burning.
Can Taiyaki be made gluten-free?
Traditional Taiyaki uses cake flour, but you can experiment with gluten-free flour blends designed for cakes. Keep in mind that texture may vary, so testing the batter consistency before cooking is a good idea.
Final Thoughts
Making Taiyaki (Japanese Fish Dessert) at home is a joyful journey that brings a little piece of Japan right to your kitchen. Whether you stick to the classic red bean filling or explore fun new flavors, this charming fish-shaped cake is guaranteed to delight your taste buds and warm your heart. So grab your Taiyaki pan, whip up the batter, and share this cozy treat with friends and family—it’s pure happiness in every bite!
PrintTaiyaki (Japanese Fish Dessert) Recipe
Taiyaki is a traditional Japanese fish-shaped cake typically filled with sweet fillings such as red bean paste, Nutella, custard, or cheese. This delightful dessert features a crispy golden exterior with a soft, fluffy interior and a warm, flavorful filling that makes it an irresistible treat perfect for any occasion.
- Prep Time: 15 minutes
- Cook Time: 12 minutes
- Total Time: 1 hour 27 minutes
- Yield: 6 taiyaki 1x
- Category: Dessert
- Method: Pan-frying
- Cuisine: Japanese
- Diet: Vegetarian
Ingredients
Dry Ingredients
- 1 1/4 cup (150 g) cake flour
- 1/4 cup (50 g) granulated sugar
- 1 teaspoon (5 g) baking powder
- 1 teaspoon (5 g) baking soda
- 1/4 teaspoon salt
Wet Ingredients
- 1 large egg
- 3/4 cup whole milk
- 1 tablespoon (15 g) vegetable oil
- 1/2 teaspoon vanilla extract
Filling
- 3/4 cup filling of choice (red bean paste, Nutella, custard, cheese, etc.)
Instructions
- Sift Dry Ingredients: In a large mixing bowl, sift together cake flour, sugar, baking powder, baking soda, and salt. Whisk the mixture to combine evenly and set aside.
- Mix Wet Ingredients: In a separate medium mixing bowl, whisk together the egg, whole milk, vegetable oil, and vanilla extract until fully combined.
- Combine Ingredients: Pour the wet ingredients into the dry ingredients bowl. Whisk gently until just combined, leaving a few lumps to maintain fluffiness. Cover the batter and refrigerate it for at least 1 hour to rest and develop texture.
- Preheat Taiyaki Pan: Heat the taiyaki pan over medium-low heat. Brush both sides of the mold with neutral oil and wipe off excess with a paper towel to prevent sticking.
- Pour Batter: Stir the chilled batter gently once more, then transfer it into a measuring cup with a spout. Pour the batter into the taiyaki mold, filling about 60% of the fish shape, leaving the tail portion empty.
- Add Filling: Place approximately 1 tablespoon of your chosen filling in the center of the batter. Using a piping bag makes it easier to add the filling evenly without disturbing the batter.
- Cover Filling: Pour additional batter over the filling to fill the fishtail portion completely. Close the mold carefully and immediately flip it over so the batter spreads evenly inside.
- Cook Taiyaki: Cook for 2 to 3 minutes on each side until the exterior is golden brown and crisp. Flip occasionally to ensure even cooking.
- Cool and Serve: Remove the taiyaki from the pan and place on a rack to cool slightly. Trim any excess batter with scissors for a neat finish. Serve warm and enjoy immediately for best texture and flavor.
Notes
- Resting the batter in the refrigerator for at least 1 hour improves texture and helps achieve a light, fluffy taiyaki.
- Use neutral oil such as vegetable or canola for brushing the taiyaki pan to avoid impacting flavor.
- If you don’t have a taiyaki pan, a small waffle maker or pancake molds can be alternatives, though shape will be different.
- Fillings can be customized based on personal preference — sweet or savory.
- Ensure the pan is heated properly and oil is applied for easy release and to prevent sticking.
- Consume taiyaki warm for optimal taste and texture; they tend to harden once cooled.
Nutrition
- Serving Size: 1 taiyaki (approx. 80 g)
- Calories: 220 kcal
- Sugar: 10 g
- Sodium: 150 mg
- Fat: 7 g
- Saturated Fat: 1.5 g
- Unsaturated Fat: 5 g
- Trans Fat: 0 g
- Carbohydrates: 34 g
- Fiber: 1.5 g
- Protein: 5 g
- Cholesterol: 40 mg
Keywords: Taiyaki, Japanese dessert, fish-shaped cake, red bean paste, Nutella, custard, sweet snack


